General information, not medical advice. Every baby is different — if anything worries you, speak to your midwife, health visitor or GP rather than waiting.
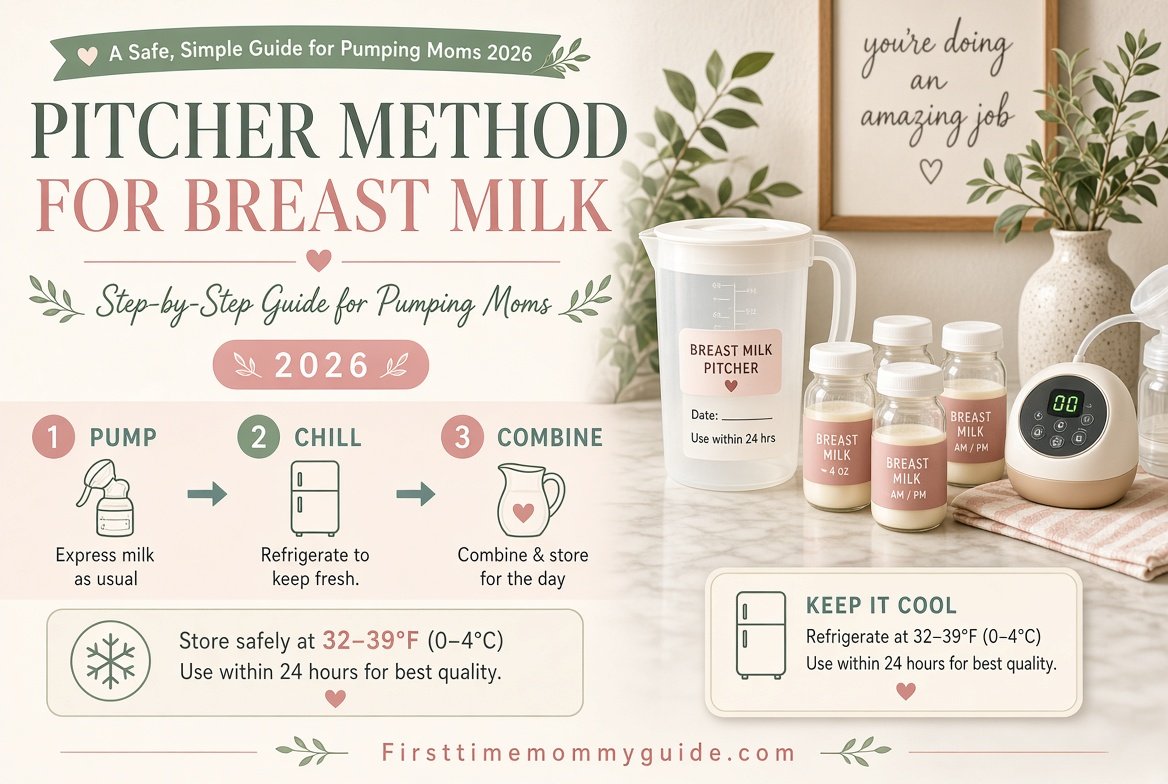
The pitcher method is a way to store pumped milk by pooling a full day’s worth into one clean container, then portioning it into bottles. Learning how to do the pitcher method for breast milk step by step takes about ten minutes, and it can save you from labeling a dozen tiny bags every day.
Pump into clean bottles, chill each fresh batch in the refrigerator, then pour the cooled milk into a labeled pitcher with a lid. Keep adding chilled milk for up to 24 hours, gently swirl, portion the next day’s bottles, and freeze the rest.
The idea is simple. Instead of storing each pumping session on its own, you combine the sessions from one day. The mixed milk is more uniform, and daily bottle prep becomes a single step.
Table of Contents
The Pitcher Method for Breast Milk at a Glance
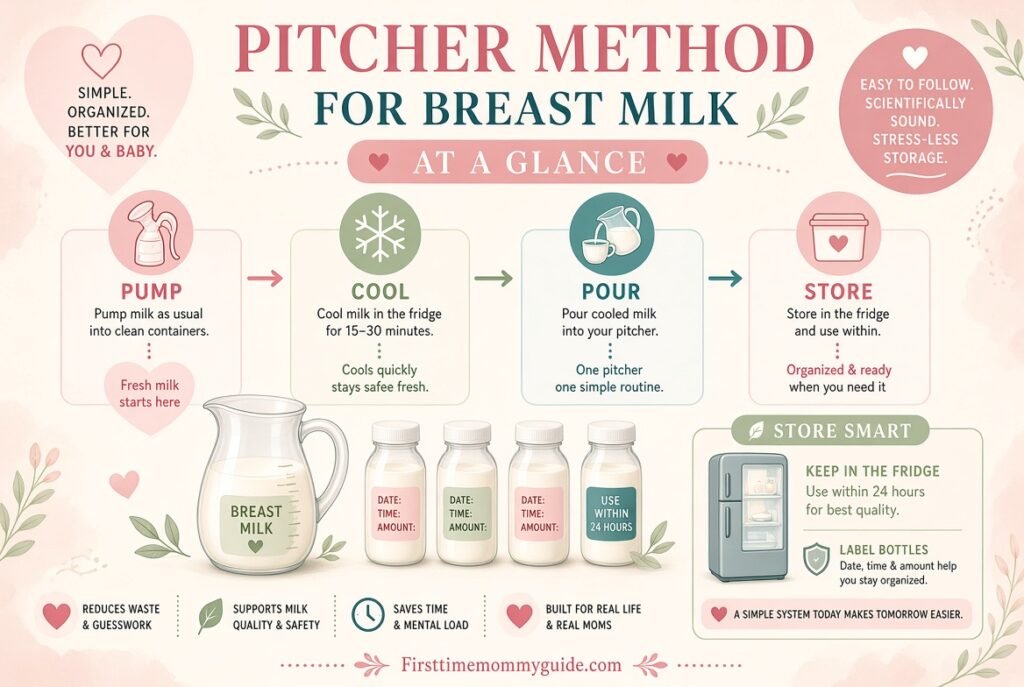
Use this table for a fast overview. Every row is explained in detail later.
| Question | Short answer |
|---|---|
| What is it? | Pooling chilled pumped milk from one day into a single container |
| How long can one pitcher collect milk? | About 24 hours |
| What goes in the pitcher? | Only milk that has been chilled to the same temperature |
| Can warm milk go straight in? | The safest approach is to chill it first |
| How should the pitcher be labeled? | With the date and time of the oldest milk |
| How long does refrigerated milk last? | Up to 4 days from the oldest milk, per the CDC |
| What happens to extra milk? | Freeze it in small, labeled portions |
| Where should the pitcher sit? | At the back of the refrigerator, with a lid |
| Who should check with a doctor first? | Parents of premature, NICU, or medically fragile babies |
What Is the Pitcher Method for Breast Milk?
The pitcher method is a form of pooled breast milk collection. You store milk from several pumping sessions in one refrigerated container for roughly a day.
Definition: The pitcher method is a breast milk storage technique in which chilled milk from multiple pumping sessions within 24 hours is combined in one covered pitcher, mixed gently, and then divided into bottles or freezer bags.
At the end of the collection period, you pour the day’s milk into the bottles your baby needs next. You freeze whatever is left.
How It Differs From the Traditional Method
The traditional method stores each pumping session separately in its own bag or bottle. Each container is labeled with its own date and time.
The pitcher method stores a whole day in one container. You label once and portion once.
Why the Name?
The name comes from the kitchen pitcher many parents use. A clean food-grade pitcher with a tight lid is the most common container. Any large, clean, lidded container works the same way.
Is It an Official Medical Method?
It is a practical routine, not a medical treatment. The pitcher method follows established milk storage guidelines from the CDC, and the American Academy of Pediatrics (AAP) has said that pooling milk from 24 hours may help even out nutrient differences between sessions.
Safety depends on how well you follow temperature and timing rules.
Why Moms Use the Pitcher Method
Pumping parents choose this method for a mix of convenience and consistency. Here are the main reasons.
More Consistent Milk
The fat content of breast milk varies. It changes across the day, and it changes with how full the breast is at each pumping session.
Pooling the day’s milk blends the richer and lighter sessions together. Every bottle then has a similar mix.
Fewer Bags and Less Waste
You skip the single-use bag for each session. Many parents save money on storage bags and reduce plastic waste.
Fewer containers also means fewer things to label, track, and lose track of in the fridge.
Faster Bottle Prep
You make the next day’s bottles in one sitting. This is a big help for parents who send milk to daycare or share feedings with a partner.
Less Mental Load
You do not need to remember which small bottle is from which time of day. The pitcher is your daily supply.
Smoother Freezer Stash
At the end of the day, you freeze one tidy batch. This makes it easier to build a freezer stash with consistent portions.
Summary of Benefits
| Benefit | What it means for you |
|---|---|
| Even composition | Bottles contain a similar blend of milk |
| Less waste | Fewer bags and fewer small leftovers |
| Time saving | One portioning session per day |
| Simple labeling | One date and time per pitcher |
| Easier daycare prep | Next-day bottles ready in minutes |
| Neater fridge | One container instead of many |
Who the Pitcher Method Works Best For
Some parents benefit more than others. See where you fit.
Exclusive Pumpers
If you pump 6 to 10 times a day, individual bags pile up quickly. A pitcher turns a day of sessions into one batch.
Working Moms
Moms who pump at work can chill milk in a workplace fridge or cooler, then pool it at home in the evening. It fits a daily rhythm.
Parents Whose Baby Goes to Daycare
Most daycares want a set number of labeled bottles each morning. The pitcher method lets you prepare them all at once.
Moms With a Steady Supply
The method works well when your daily output is reasonably predictable. You can plan the next day’s bottles with confidence.
Parents Who Share Feedings
When a partner or grandparent gives bottles, a labeled pitcher and a few clear instructions simplify everything.
Who Should Skip It or Ask a Professional First
The pitcher method is not right for every situation. A few groups should talk to a professional before pooling milk.
Premature or NICU Babies
Hospitals often give strict handling rules for milk fed to premature or sick infants. Some NICUs ask parents not to combine sessions at all.
Follow your NICU team’s instructions. They know your baby’s needs.
Babies With Weakened Immune Systems
Babies with serious medical conditions may need extra precautions. Ask your pediatrician before you pool milk.
Parents Who Need to Track Individual Sessions
Pooling means you lose the ability to separate sessions. Keep a session apart if you need to track it, for example after taking a medication your provider asked you to time carefully.
Ask your doctor or pharmacist how to handle milk when you take a medication. A lactation consultant can help you plan.
Early Colostrum
Newborns drink very small amounts of colostrum. Many parents keep those first drops in small separate containers or syringes, since there is rarely enough volume to fill a pitcher.
The pitcher method becomes useful once your supply comes in and volumes increase.
Low-Volume Pumpers
If you pump only a few ounces a day, a large pitcher is unnecessary. Small containers or a single bottle may work better.
What You Need for the Pitcher Method
You probably own most of the equipment already. Here is the full list.
| Item | Purpose | Tips |
|---|---|---|
| Clean pitcher with a tight lid | Holds the pooled milk | Glass or BPA-free plastic; a pour spout helps |
| Breast pump and collection bottles | Collect each session | Use clean, dry parts |
| Refrigerator with a thermometer | Keeps milk cold | Aim for 40°F (4°C) or colder |
| Labels or masking tape and a marker | Date and time tracking | Label with the oldest milk |
| Bottles or small containers | Portion for feedings | Use a standard feeding volume |
| Freezer bags or hard containers | Freeze extra milk | Leave room for expansion |
| Insulated cooler and ice packs | Transport milk | Needed for work or travel |
| Dish soap and a dedicated wash basin | Cleaning | Wash all parts that touch milk |
Choosing the Right Pitcher
Pick a pitcher with a tight-fitting lid. A lid protects the milk from odors in the fridge and prevents spills.
Choose a size that holds your daily output with space to spare. Many exclusive pumpers collect around 25 to 35 ounces in a day, so a pitcher of 2 quarts (64 ounces) leaves plenty of room. Your own output may be higher or lower.
Glass vs Plastic
| Feature | Glass pitcher | BPA-free plastic pitcher |
|---|---|---|
| Weight | Heavier | Lighter |
| Breakage risk | Higher | Lower |
| Staining and odors | Resists staining and odors | May hold odors over time |
| Cleaning | Easy to clean and sanitize | Easy; check dishwasher safety |
| Cost | Moderate | Often lower |
The CDC advises storing milk in clean glass or hard, BPA-free plastic containers. Check labels, and avoid containers with the recycle symbol 7 unless they are marked BPA-free.
Features Worth Having
- A wide mouth for easy cleaning.
- Volume markings on the side so you can measure ounces or milliliters.
- A lid that locks or seals tightly.
- A smooth interior with no hard-to-reach corners.
- A shape that fits on a refrigerator shelf at the back.
Items to Avoid
- A pitcher that has held anything other than food or drink, such as paint or chemicals.
- A container with a cracked lid or damaged seal.
- A pitcher with a filter insert, unless you remove the filter and clean all parts.
- Any container you cannot wash thoroughly.
Breast Milk Storage Guidelines From the CDC
Before using the pitcher method, know the baseline rules. These are the CDC’s storage times for healthy, full-term babies.
| Type of milk | Room temperature (77°F / 25°C or colder) | Insulated cooler with ice packs | Refrigerator (40°F / 4°C) | Freezer (0°F / −18°C) |
|---|---|---|---|---|
| Freshly expressed | Up to 4 hours | Up to 24 hours | Up to 4 days | Within 6 months is best; up to 12 months is acceptable |
| Thawed, previously frozen | 1 to 2 hours | Not recommended | Up to 24 hours | Never refreeze |
| Leftover from a feeding | Use within 2 hours after the baby finishes feeding | Not applicable | Not applicable | Not applicable |
Key Rules That Apply to the Pitcher Method
- Combine milk only when it is at the same temperature.
- Date the container with the oldest milk in it.
- Never refreeze milk that has been thawed.
- Throw away milk left in a bottle two hours after the baby finishes feeding.
These guidelines are for healthy, full-term babies. Premature babies and babies with health conditions may need different rules, so follow your care team’s advice.
Why Temperature Matters
Breast milk is not sterile. Bacteria can grow when milk sits at warm temperatures.
Cold slows that growth. That is why chilling fresh milk before pooling it matters so much.
How to Do the Pitcher Method for Breast Milk Step by Step
Follow these eleven steps each day. Once the routine feels natural, the whole process adds only a few minutes to your day.
Step 1: Wash Your Hands and Prepare a Clean Space
Wash your hands with soap and water for about 20 seconds before every pumping session. Dry them with a clean towel.
Set out clean, dry pump parts and a clean collection bottle. A clean surface prevents contamination before the milk even leaves your body.
Step 2: Pump Into a Clean Collection Bottle
Pump as usual into the bottles that come with your pump. Do not pump directly into the pitcher.
Pumping into a small bottle first lets you chill each batch on its own. It also keeps the main pitcher clean and cold.
Step 3: Label the Bottle With the Date and Time
Write the date and the time you pumped on a piece of tape or a label. This takes five seconds and removes any guesswork later.
The first label of the day matters most. It marks the start of your pitcher’s 24-hour window.
Step 4: Cool the Fresh Milk in the Refrigerator
Place the capped bottle in the refrigerator right away. Put it at the back, not in the door.
Give the milk enough time to cool completely, which often takes about an hour depending on the volume. The goal is milk that is fully cold before it meets the milk already in the pitcher.
Step 5: Pour the Cooled Milk Into the Pitcher
Once the milk is cold, pour it into the pitcher. This is where the pooling happens.
Never add warm milk to cold milk if you are following the cautious approach. See the section on warm and cold milk below for the guidance from the CDC and the AAP.
Step 6: Label the Pitcher
Add a label to the pitcher with the date and time of the oldest milk inside. If the first pumping of the day was at 6:00 a.m., write that.
The oldest time controls how long the whole batch lasts. Every bottle you make from the pitcher inherits that time.
Step 7: Cover and Store the Pitcher Correctly
Put the lid on tightly. Place the pitcher at the back of the refrigerator, where the temperature is most stable.
Avoid the door. Opening and closing it causes temperature swings.
Step 8: Repeat for Each Pumping Session Through the Day
Pump, label, chill, then pour. Do the same for each session, up to 24 hours from the first milk.
If a session is at the very end of the collection window, you can start a new pitcher instead. Each pitcher should hold no more than one day of milk.
Step 9: Swirl Gently and Portion the Bottles
At the end of the collection period, take out the pitcher. Swirl it gently to blend the layers.
Avoid shaking hard. Gentle swirling is enough to mix the fat back into the milk.
Pour the milk into the bottles your baby will need over the next day or two. Fill each bottle to the volume your baby usually drinks.
Step 10: Freeze the Leftover Milk
Pour any extra milk into freezer bags or hard containers in small portions of 2 to 4 ounces. Leave about one inch of space at the top for expansion.
Label each portion with the date and time of the oldest milk. Freeze it right away.
Step 11: Clean the Pitcher and All Parts
Wash the pitcher, lid, and any tools in hot, soapy water. Rinse well and let everything air-dry on a clean towel or rack.
Start the next day with a clean, dry pitcher. Never add new milk to a pitcher that has not been washed.
Step Summary
| Step | Action | Key safety point |
|---|---|---|
| 1 | Wash hands, set up clean space | Prevents contamination |
| 2 | Pump into a clean bottle | Keeps the pitcher clean |
| 3 | Label date and time | Tracks the oldest milk |
| 4 | Chill the fresh milk | Cool before combining |
| 5 | Pour into the pitcher | Same temperature only |
| 6 | Label the pitcher | Use the oldest time |
| 7 | Cover and store at the back | Stable cold temperature |
| 8 | Repeat all day | Stay within 24 hours |
| 9 | Swirl and portion | Gentle mixing |
| 10 | Freeze leftovers | Small portions, headspace |
| 11 | Wash the pitcher | Clean before reuse |
Can You Add Fresh Warm Milk to the Pitcher? CDC vs AAP Guidance

This is the most debated question about the pitcher method. The guidance is not identical across organizations, so it helps to know both views.
The Cautious Approach (Cool First)
The CDC advises combining milk that is at the same temperature. Freshly pumped milk is warm, so chill it first. Then add it to milk that is already cold.
This approach follows the principle that adding warm milk to cold milk raises the overall temperature, which can give bacteria a chance to grow.
The More Flexible View
The AAP’s breastfeeding FAQ has stated that mothers can mix warm and cold milk, and that pooling milk from 24 hours may help even out variability in nutrients caused by pumping time and breast emptying.
Some lactation professionals feel comfortable with this approach for healthy, full-term babies. Others still prefer chilling first.
What I Recommend
Chill first. It costs you very little time, and it matches the most conservative guidance. If you are feeding the milk right away, temperature mixing matters much less, because bacteria have no time to grow.
If your baby is premature, hospitalized, or has a medical condition, follow the specific instructions from your baby’s care team.
| Approach | What you do | Who supports it |
|---|---|---|
| Cool first (recommended) | Chill each batch, then add to the pitcher | CDC guidance on matching temperatures |
| Warm into cold | Add fresh milk straight to chilled milk | Described as acceptable in some AAP guidance |
| Feeding immediately | Mix temperatures and feed right away | Low risk because of the short time |
Sample Daily Schedule for the Pitcher Method
Seeing a real day helps. This example follows a parent who pumps seven times and sends milk to daycare.
| Time | Pumped amount | What to do |
|---|---|---|
| 6:00 a.m. | 5.0 oz | Label “Mon 6:00 a.m.” and refrigerate in a bottle |
| 9:00 a.m. | 4.0 oz | Chill in the workplace fridge or a cooler |
| 12:00 p.m. | 4.0 oz | Chill |
| 3:00 p.m. | 4.0 oz | Chill |
| 6:00 p.m. | 3.5 oz | Chill; pour the earlier cooled bottles into the pitcher at home |
| 9:00 p.m. | 4.0 oz | Chill for an hour, then add to the pitcher |
| 11:30 p.m. | 3.5 oz | Chill, then add to the pitcher |
| Total | 28.0 oz | Pitcher labeled “Mon 6:00 a.m.” |
Using the Day’s Milk
Suppose the baby takes about 25 ounces over 24 hours in eight feedings. That is roughly 3 ounces per bottle.
After the 11:30 p.m. session, swirl the pitcher and fill the next day’s bottles. Eight bottles of 3 ounces use 24 ounces.
The remaining 4 ounces go into freezer bags, labeled with the same date and time, and into the freezer.
Reading the Plan
- Pitcher label: Mon 6:00 a.m.
- Use refrigerated bottles by: Fri 6:00 a.m. (four days from the oldest milk).
- Freezer bags: label “Mon 6:00 a.m.,” and note the amount.
This plan works even if you only pump three or four times a day. The same steps apply with fewer sessions.
How to Calculate Bottle Size From the Pitcher
Bottle math makes the pitcher method practical. You want enough milk for each feeding and little waste.
Typical Daily Intake
Many exclusively breastfed babies take roughly 19 to 30 ounces of milk per 24 hours between about one and six months of age. Individual babies vary a lot.
Your pediatrician can tell you what is right for your baby. Hunger cues matter more than any chart.
Simple Formula
Ounces per bottle = daily ounces ÷ number of feedings
| Daily intake | Feedings per day | Ounces per bottle |
|---|---|---|
| 20 oz | 8 | 2.5 oz |
| 24 oz | 8 | 3 oz |
| 24 oz | 6 | 4 oz |
| 28 oz | 7 | 4 oz |
| 30 oz | 8 | 3.75 oz (about 4 oz) |
Prepare Small Extra Portions
Make a few bottles with 1 to 2 ounces instead of the full amount. Babies sometimes want a top-up, and small portions avoid waste.
Milk left in a bottle after a feeding must be used within two hours of the baby finishing. After that, you need to discard it.
Ounces to Milliliters
| Ounces | Approximate milliliters |
|---|---|
| 1 oz | 30 mL |
| 2 oz | 59 mL |
| 3 oz | 89 mL |
| 4 oz | 118 mL |
| 5 oz | 148 mL |
| 6 oz | 177 mL |
| 8 oz | 237 mL |
Pitcher Method Timeline and Expiration Dates
The date on the pitcher decides everything. Here is how to count.
The 24-Hour Collection Window
The pitcher collects milk for about one day. When the window ends, you portion the milk and start fresh.
Do not keep adding milk to the same pitcher for several days. Each new addition would restart your tracking and make the oldest date unclear.
The 4-Day Refrigerator Clock
The CDC says freshly expressed milk lasts up to 4 days in the refrigerator. Count from the oldest milk in the container.
If the pitcher’s oldest milk was pumped Monday at 6:00 a.m., every bottle from that pitcher should be used or frozen by Friday at 6:00 a.m.
Practical Timeline Example
| Day | Event | Date to remember |
|---|---|---|
| Monday | Collect milk in the pitcher, oldest milk at 6:00 a.m. | Start of 4-day clock |
| Tuesday | Portion bottles, freeze leftover | Use bottles first |
| Wednesday | Use refrigerated bottles | Oldest bottles first |
| Thursday | Use remaining bottles | Check the label |
| Friday, 6:00 a.m. | Final deadline for Monday’s milk | Discard or freeze before this time |
First In, First Out
Always use the oldest milk first. If you have bottles from two different pitchers, grab the one with the earlier date.
This habit keeps every bottle inside the safe window.
Freeze Early for Best Quality
Frozen milk keeps for much longer than refrigerated milk, with the CDC giving 6 months as best and up to 12 months as acceptable. Fresh milk is still better than frozen, and refrigerated milk is better than milk that has been sitting for days.
If you know you will not use a portion within a few days, freeze it early. Do not wait until day four.
How to Freeze Breast Milk From the Pitcher
Freezing is the second half of the pitcher method. A good freezing routine protects your stash and avoids waste.
Choose the Right Containers
You can use breast milk storage bags, or hard-sided glass or BPA-free plastic containers with tight lids. Both work well.
Bags save space and thaw faster. Hard containers are easier to fill and are reusable.
Freeze in Small Portions
Store milk in amounts your baby typically drinks at one feeding, usually 2 to 4 ounces. Small portions thaw quickly and waste less.
You can also freeze a few 1-ounce portions for top-ups or to add to a partial bottle.
Leave Room for Expansion
Milk expands as it freezes. Leave about one inch of space at the top of a container.
Do not fill storage bags beyond the line on the bag. Overfilled bags can leak or burst.
Remove Air and Freeze Flat
Squeeze the air out of the bag before sealing. Lay the bag flat on a tray or baking sheet in the freezer.
Flat bags freeze quickly and stack neatly. Once frozen, you can stand them upright like files.
Label Everything
Write the following on each bag.
- The date and time of the oldest milk in the batch.
- The amount in ounces or milliliters.
- Your baby’s name, if the milk will go to daycare.
Where to Store Frozen Milk
Place bags at the back of the freezer, where the temperature stays most stable. Avoid the door.
A freezer kept at 0°F (−18°C) or colder gives the best results. A deep freezer is ideal for large stashes.
Never Add Warm Milk to Frozen Milk
Do not pour warm or fresh milk onto milk that is already frozen. The warm milk can partly thaw the frozen layer.
Chill the new milk first, or freeze it in its own bag.
Freezing Quick Reference
| Rule | Why it matters |
|---|---|
| Portions of 2 to 4 oz | Less waste at feeding time |
| One inch of headspace | Prevents leaks and breakage |
| Freeze flat | Faster freezing, easier storage |
| Date and time on every bag | Tracks the oldest milk |
| Back of the freezer | Stable temperature |
| Use oldest first | Keeps rotation safe |
How to Thaw and Warm Breast Milk
Frozen milk needs gentle handling. Rushing or overheating can damage milk quality and create safety risks.
Safe Ways to Thaw
- In the refrigerator overnight. This is the gentlest and safest method.
- Under cool or lukewarm running water. Hold the bag or bottle under the tap.
- In a bowl of warm water. Set the sealed container in the bowl for a few minutes.
What Never to Do
- Never microwave breast milk. It heats unevenly and can scald a baby’s mouth.
- Never boil breast milk.
- Never thaw milk at room temperature on the counter for hours.
- Never refreeze milk after it has thawed.
How Long Thawed Milk Lasts
According to the CDC, thawed milk can stay in the refrigerator for up to 24 hours. Once it is warmed to room temperature, use it within 1 to 2 hours.
After the baby starts drinking from a bottle, use the milk within 2 hours.
Warming Steps
- Place the sealed bottle in a bowl of warm water, or hold it under warm running water.
- Swirl the bottle gently to mix the fat back into the milk.
- Test a few drops on the inside of your wrist. The milk should feel lukewarm, not hot.
- Feed within the time limits above.
Breast milk does not need to be warmed. Many babies drink it at room temperature or even cold.
Combining Thawed Milk
You can combine thawed milk from several containers for a single feeding. Make sure the milk is at the same temperature, and keep track of the oldest thaw time.
Cleaning and Hygiene for the Pitcher Method
Good hygiene is the foundation of safe pooling. Breast milk is not sterile, so you want to keep extra bacteria out.
Wash Your Hands First
Wash with soap and water before every pumping session and before handling milk or equipment.
Clean Pump Parts After Each Use
Take apart every piece that touches your breast or milk. Rinse them in cool water, then wash them with dish soap and warm water in a clean basin used only for infant feeding items.
Air-dry the parts on a clean towel or rack. Avoid using a cloth dish towel to dry them.
Sanitize Daily When Needed
The CDC recommends sanitizing pump parts at least once daily, especially for babies younger than about three months, premature babies, or babies with a weakened immune system.
Sanitizing options include boiling parts in water for a few minutes, steaming them, or running them through a dishwasher with a sanitizing setting.
Clean the Pitcher Every Day
Wash the pitcher and lid thoroughly after each use. Pay attention to the lid seal and any grooves where milk can hide.
Sanitize the pitcher regularly. Do it daily if your baby is young or medically vulnerable.
Daily Hygiene Checklist
| Task | How often |
|---|---|
| Wash hands | Before every pumping session |
| Wash pump parts | After every session |
| Sanitize pump parts | At least once a day for young babies |
| Wash the pitcher and lid | After every collection day |
| Check the fridge temperature | Weekly with a thermometer |
| Wipe the fridge shelf | As needed |
How to Tell if Breast Milk Has Gone Bad
Safe storage rules are your first line of defense. Your senses are the second.
Signs of Spoiled Milk
- A sour or rancid smell, like spoiled cow’s milk.
- A sour taste, if you test a drop.
- Milk that stayed out longer than the safe time, even if it smells fine.
When in doubt, throw it out.
Normal Changes That Do Not Mean Spoilage
Breast milk separates in the fridge. The cream rises to the top and the thinner milk settles below.
This is normal. Swirl the milk gently, and it recombines.
Breast milk can also vary in color. It may look slightly yellow, blue, or green, depending on your diet and the time of day.
The Soapy Smell: Lipase
Some milk develops a soapy or metallic smell after refrigeration or freezing. This is often caused by lipase, an enzyme that breaks down fat.
The milk is usually safe, but some babies refuse it. If this happens, talk to a lactation consultant about options.
| Sign | Likely meaning | What to do |
|---|---|---|
| Layer of cream on top | Normal separation | Swirl gently |
| Slight color change | Normal variation | No action needed |
| Soapy or metallic smell | Possible high lipase | Ask a lactation consultant |
| Sour or rancid smell | Spoiled milk | Discard |
| Milk past the time limit | Unsafe | Discard |
Pitcher Method vs Traditional Bagging
Many parents wonder which method is better. The right answer depends on your situation.
| Feature | Pitcher method | Traditional bag-and-tag method |
|---|---|---|
| Containers | One pitcher per day | One bag or bottle per session |
| Labeling | Once per pitcher | Every session |
| Milk composition | Blended across the day | Varies by session |
| Daily bottle prep | One portioning step | Pick bottles from separate bags |
| Waste | Low | Moderate to high |
| Cost | Lower after buying a pitcher | Ongoing cost for bags |
| Tracking an individual session | Not possible after pooling | Easy |
| Risk if spilled | One large loss | Small losses |
| Best for | Daily pumpers with steady output | Occasional pumpers and NICU parents |
Combine the Two
You do not have to choose only one. Many parents use the pitcher method for daily bottles and traditional bags for specific sessions, such as a bag of colostrum or a session that must be tracked.
Pros and Cons of the Pitcher Method
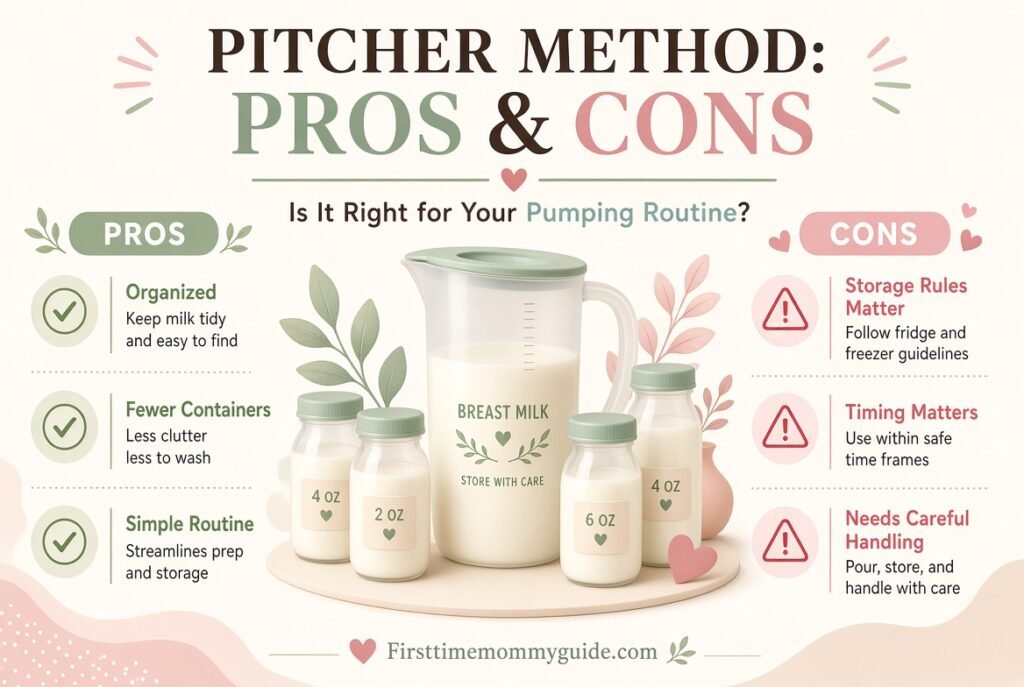
A fair look at both sides helps you decide.
| Pros | Cons |
|---|---|
| Even milk composition across bottles | Cannot separate individual sessions |
| Less packaging and lower cost | A spill can lose a lot of milk |
| One label, one portioning session | Requires daily cleaning of a large container |
| Great for daycare prep | Needs a precise approach to temperatures |
| Simple freezer stash | Not suited to NICU or medically fragile babies without approval |
| Easy to measure the day’s total | Needs enough fridge space |
Cut the Spill Risk
Use a lid with a tight seal. Keep the pitcher in a stable spot at the back of the fridge, away from items that might knock it over.
Use a pitcher with a handle for easy pouring.
Pitcher Method for Working Moms
Returning to work adds logistics. The pitcher method can still fit.
At Work
Pump into collection bottles and label each one. Store them in a workplace refrigerator or an insulated cooler bag with ice packs. The CDC says milk can stay in an insulated cooler with ice packs for up to 24 hours.
At Home
When you get home, move the chilled milk to the pitcher. Wait to pool any milk that is still warm until it has been chilled.
Preparing Daycare Bottles
In the evening, swirl the pitcher and fill the bottles for the next day. Write your baby’s name, the date, and the oldest pumping time on each bottle.
Your Rights at Work
Many U.S. employers must provide time and a private space, other than a bathroom, for pumping. The U.S. Department of Labor explains these protections for eligible workers.
Daycare Handoff Tips
- Tell the caregiver to use the oldest bottle first.
- Ask them to feed in small amounts using paced bottle feeding.
- Remind them to discard leftover milk 2 hours after the baby finishes the feed.
- Do not send frozen and thawed milk together without clear labels.
Pitcher Method for Exclusive Pumpers
Exclusive pumpers produce the most milk and spend the most time on logistics. The method fits well.
Keep a Simple Routine
Pump, label, chill, pour. Set a reminder to portion the milk at the same time every day.
Use Two Pitchers if Needed
If you collect a large volume or overlap days, use two pitchers. Label them clearly with start dates.
Track Your Daily Total
Write down the amount in the pitcher each day. Over a week, you will see patterns that help you plan bottles and freezer stash goals.
Protect Your Supply
The pitcher method manages storage. It does not change how much you make. Frequent, effective milk removal is what keeps your supply steady.
If your supply drops, see a lactation consultant (IBCLC). They can check your pump, flange fit, and schedule.
Pitcher Method for Night Feeds and Travel
Your routine will not always follow a neat schedule. A few adjustments help.
Night Pumping
If you pump overnight, add that milk to the pitcher after it has chilled. Or start the next day’s pitcher with it, depending on your timing.
Label the bottle clearly so you know which window it belongs to.
Traveling
Carry milk in an insulated cooler bag with frozen ice packs. The CDC says milk can stay in a cooler with ice packs for up to 24 hours.
For flights in the U.S., the Transportation Security Administration (TSA) allows breast milk in reasonable quantities. Check the TSA website before you fly for the current screening rules.
Away From Home
Pump into bottles and chill them in a cooler, then pool the milk when you return to a refrigerator. Do not pour milk into the pitcher until it is fully cold.
Combo Feeding: Breast Milk and Formula
Some families use both. Keep them separate in the pitcher.
Do Not Put Formula in the Breast Milk Pitcher
Formula and breast milk have different storage rules. Prepared formula has its own limits. Under CDC guidance, it should be used within 1 hour of the start of a feeding, and prepared formula kept in the refrigerator should be used within 24 hours.
Mixing formula into the breast milk pitcher would shorten the life of the whole batch.
Preparing Mixed Bottles
If you want to combine the two in a bottle, prepare the formula by itself first. Then add the breast milk right before feeding.
Follow the shorter time limit of the two products. Check the formula container for its guidelines.
Formula Pitchers Are Separate
Some parents use a similar pitcher method for formula. That is a separate routine with its own rules. Never share a pitcher between formula and breast milk.
Why Breast Milk Composition Changes and What Pooling Does
Understanding the science explains why many parents like the pitcher method. Breast milk is not the same in every session.
Fat Content Changes
Fat is the most variable part of breast milk. It changes with how full the breast is and how long it has been since the last milk removal.
A well-drained breast tends to produce milk with a higher fat percentage. A very full breast tends to produce milk with a lower one.
Differences Across the Day
Milk composition also shifts during the day. Many parents notice that a late-afternoon or evening session looks creamier than a morning session.
Every parent’s pattern is different. There is no single schedule that fits everyone.
What Pooling Does
Pooling averages these differences. Each bottle then contains a similar blend, instead of one very rich bottle and one very light bottle.
The AAP has noted that pooling milk from 24 hours may help even out variability in nutrients. This is the main nutritional argument for the pitcher method.
What Pooling Does Not Do
Pooling does not make milk more nutritious. It does not increase your supply, and it does not remove the need for safe storage.
It simply makes the milk more uniform across feedings.
A Note for Premature Babies
Premature babies need carefully managed nutrition, and some hospitals add fortifiers to a baby’s milk under medical supervision. This is a hospital process, not something to copy at home.
If your baby was born early, follow your neonatal team’s instructions.
Common Mistakes With the Pitcher Method
Most problems come from a handful of repeat errors. Check this list often.
| Mistake | Why it is a problem | Fix |
|---|---|---|
| Adding warm milk to cold milk | Raises the temperature of the whole batch | Chill each batch first |
| Using an unwashed pitcher | Introduces bacteria | Wash after every collection day |
| Labeling with the newest time | Hides the real age of the milk | Label with the oldest milk |
| Keeping the pitcher in the door | Temperature swings | Store at the back of the fridge |
| Leaving the lid off | Contamination and odor absorption | Use a tight lid |
| Collecting for more than 24 hours | Unclear dates and higher risk | Portion and restart each day |
| Pouring leftover bottle milk back | Introduces saliva and bacteria | Never return milk to the pitcher |
| Overfilling the freezer bags | Leaks and bursts | Leave one inch of space |
| Refreezing thawed milk | Safety risk | Use or discard within the time limit |
| Warming milk in a microwave | Hot spots can burn the baby | Use warm water |
| Mixing formula into the pitcher | Different storage rules | Keep formula separate |
The Most Dangerous Mistake
Mixing warm and cold milk without thinking, then keeping the batch for several days, creates the greatest risk. Take the extra time to chill first.
The Most Common Mistake
Forgetting to label. Without a date and time, you cannot know when the milk expires. Label every bottle and every pitcher, every day.
Troubleshooting the Pitcher Method
Problems come up even with a good routine. Here are common ones and their solutions.
My Pitcher Is Not Full Enough
A half-empty pitcher is fine. The method works at any volume.
If your daily output is small, use a smaller container such as a bottle or a small lidded jar.
I Pumped Too Much for the Pitcher
Use a second pitcher or portion the extra milk into freezer bags as soon as it chills. Label the second container clearly.
The Milk Smells Strange After Chilling
A slightly soapy smell can come from lipase. A sour smell means spoilage. Taste a drop if you are unsure, and discard milk that tastes sour.
The Milk Separated Into Layers
This is normal. Swirl gently before pouring.
My Baby Refuses Milk From the Pitcher
Pooled milk should taste similar to individual sessions. If your baby refuses all stored milk, high lipase activity may be the cause.
Try a smaller volume, a different bottle nipple, or ask a lactation consultant for help.
I Forgot to Label the Pitcher
If you cannot be sure of the time of the oldest milk, the safest choice is to discard it. It is hard to lose milk, but safety matters more.
My Fridge Is Not Cold Enough
Use a fridge thermometer. The target is 40°F (4°C) or colder. Adjust the dial and recheck after several hours.
Quick Troubleshooting Table
| Problem | Likely cause | Solution |
|---|---|---|
| Soapy smell | High lipase | Ask a lactation consultant |
| Sour smell | Spoilage | Discard |
| Layers of cream | Normal separation | Swirl gently |
| Bag leaked in freezer | Overfilled | Leave one inch of space |
| Not enough milk for all bottles | Lower output than expected | Make smaller bottles; add a pumping session |
| Unsure of date | Missing label | Discard if you cannot verify |
| Pitcher overflowing | Too much volume | Use a second pitcher |
Tips for Building a Freezer Stash With the Pitcher Method
A freezer stash gives you a buffer for sick days, busy weeks, and returning to work. The pitcher method makes building one easier.
Freeze the Surplus Daily
Each day, portion the bottles you need and freeze the extra. Even 1 to 3 ounces a day adds up.
Over a month, a small daily surplus can become a meaningful stash.
Start Small
You do not need a giant stash. Many working parents aim for a few days of bottles as a safety net, since they will keep pumping at work.
Build a stash that fits your freezer space and your needs.
Rotate Your Stash
Use the oldest bags first. Check the dates when you add new bags.
The CDC says frozen milk is best within 6 months and acceptable up to 12 months.
Keep Records
Write the number of ounces in the freezer on a note on the door or in a phone app. This lets you see at a glance how much you have.
Do Not Stress About Numbers
Supply varies. A smaller stash is perfectly fine, especially if you can pump at work.
Pumping Tips to Help the Pitcher Fill
The pitcher method manages the milk you already have. A few pumping habits can support a steady supply.
Pump on a Regular Schedule
Regular milk removal tells your body to keep making milk. Many parents pump every 2 to 3 hours in the early weeks, then adjust as supply stabilizes.
Your pattern may differ. Ask your lactation consultant what suits you.
Check Flange Fit
A flange that is too big or too small can cause pain and reduce output. Pumping should not hurt.
If you have pain, redness, or pinching, ask a lactation consultant to check your fit.
Try Hands-On Pumping
Massage and compress your breasts while pumping. Many parents find that this helps them express more milk.
Stay Hydrated and Nourished
Drink to thirst and eat regular meals. Rest when you can.
Get Support Early
An International Board Certified Lactation Consultant (IBCLC) can help with latch, supply, and pumping problems. In the U.S., the Women, Infants, and Children program (WIC) offers breastfeeding support for qualifying families.
La Leche League also runs free mother-to-mother support groups.
Writing Clear Instructions for Daycare and Caregivers
Good instructions protect your baby and your milk. Give caregivers a short, clear page.
What to Include
- Your baby’s name and typical amount per feeding.
- How to read the label: date and time of the oldest milk.
- To use the oldest bottle first.
- To warm bottles in a bowl of warm water, never a microwave.
- To swirl, not shake, before feeding.
- To throw away any milk left 2 hours after the baby finishes drinking.
- To offer paced bottle feeding.
What Caregivers Should Not Do
- Do not combine milk from different bottles after feeding starts.
- Do not return leftover milk to the refrigerator.
- Do not refreeze thawed milk.
Sample Label
| Field | Example |
|---|---|
| Baby’s name | Emma R. |
| Date | 5/12 |
| Oldest milk pumped | 6:00 a.m. |
| Amount | 4 oz |
| Notes | Fresh, not frozen |
Paced Bottle Feeding With Pitcher Milk
How the baby drinks matters as much as how the milk is stored. Paced bottle feeding mimics the flow of breastfeeding.
Why It Helps
It lets the baby control the pace. It can reduce overfeeding and make it easier to move between breast and bottle.
Basic Steps
- Hold the baby fairly upright, with the head supported.
- Hold the bottle horizontally so milk fills only part of the nipple.
- Let the baby draw the nipple in and suck.
- Tip the bottle up for a few sucks, then lower it for a pause.
- Switch sides halfway through, as you would at the breast.
A feeding should take about 10 to 20 minutes. Watch for fullness cues, such as turning away or slowing down.
Daily Checklist for the Pitcher Method
Use this list each day until the routine becomes automatic.
Morning
- Wash hands and clean the pitcher.
- Pump and label the first bottle with the date and time.
- Chill the bottle in the refrigerator.
During the Day
- Pump, label, and chill each batch.
- Add chilled milk to the pitcher and replace the lid.
- Keep the pitcher at the back of the fridge.
Evening
- Swirl the pitcher gently.
- Fill the next day’s bottles, using the oldest time on every label.
- Freeze the extra milk in small, labeled portions.
- Wash the pitcher, lid, and all pump parts.
Quick Reference Cheat Sheet
Keep this table where you can see it.
| Topic | Rule |
|---|---|
| Collection window | About 24 hours per pitcher |
| Fridge temperature | 40°F (4°C) or colder |
| Combining milk | Same temperature only; chill first |
| Label | Date and time of the oldest milk |
| Fridge life | Up to 4 days from the oldest milk |
| Room temperature | Up to 4 hours at 77°F (25°C) or colder |
| Cooler with ice packs | Up to 24 hours |
| Freezer life | 6 months is best; up to 12 months is acceptable |
| Thawed milk in fridge | Up to 24 hours |
| Warmed milk | Use within 1 to 2 hours |
| Leftover after a feeding | Use within 2 hours, then discard |
| Refreezing | Never refreeze thawed milk |
| Microwave | Never |
| Freezer portion | 2 to 4 ounces with one inch of space |
When to Talk to a Professional
The pitcher method is a convenience tool. Some situations call for expert advice.
Call Your Pediatrician If
- Your baby was born prematurely or has a medical condition.
- Your baby has weight gain problems.
- Your baby refuses all stored milk.
- Your baby seems ill after drinking stored milk, with vomiting, diarrhea, or fever.
See a Lactation Consultant If
- Pumping is painful.
- Your supply is dropping.
- You are unsure about flange size or pump settings.
- Your milk has a persistent soapy smell and your baby refuses it.
Seek Urgent Care If
Your baby has a fever, trouble breathing, extreme sleepiness, or signs of dehydration, such as very few wet diapers. Contact a health professional right away.
This guide shares general education based on CDC and AAP guidance and is not a replacement for individual medical advice.
Where Guidelines Come From
Reliable information makes the difference between a safe routine and a risky one. These are the main sources behind the advice in this guide.
| Source | What it provides |
|---|---|
| Centers for Disease Control and Prevention (CDC) | Storage times, temperatures, hygiene, and combining milk |
| American Academy of Pediatrics (AAP) | Guidance on pooling and mixing warm and cold milk |
| Academy of Breastfeeding Medicine (ABM) | Clinical protocols on human milk storage |
| U.S. Department of Labor | Workplace pumping protections |
| Transportation Security Administration (TSA) | Rules for traveling with breast milk |
| WIC and La Leche League | Community breastfeeding support |
Why Guidelines Differ Slightly
Different organizations have updated their wording at different times. Some research is limited, so expert groups sometimes reach slightly different conclusions.
When guidance conflicts, choose the more cautious option, and ask your pediatrician if you are unsure.
Pitcher Method Myths and Facts
Online advice mixes solid guidance with guesswork. These corrections help you sort the two.
| Myth | Fact |
|---|---|
| Pooling milk makes it more nutritious | Pooling evens out differences between sessions. It does not add nutrients |
| You can keep adding milk to one pitcher for a week | Plan on about 24 hours per pitcher, and count the 4-day limit from the oldest milk |
| Warm milk is fine to add if the pitcher is cold | The cautious approach is to chill first and combine at the same temperature |
| Freezing makes any milk safe forever | The CDC says 6 months is best and up to 12 months is acceptable |
| Soapy-smelling milk is always spoiled | It may be high lipase. Sour or rancid milk is the real warning sign |
| The pitcher method works the same for every baby | Premature and medically fragile babies may need different handling |
| A bigger pitcher is always better | A pitcher that is too large for your volume is harder to fill and clean |
Why Myths Spread
Parents share what worked for them, and a routine that was safe for one family may not suit another. Guidelines also changed over time, so older advice can conflict with newer advice.
Go back to the CDC and your pediatrician when something sounds off.
How to Organize Your Refrigerator for the Pitcher Method
A tidy fridge supports safe storage. A little planning keeps the milk cold and stable.
Pick the Right Shelf
Choose a shelf near the back, away from the door and away from the very top or bottom if your fridge has temperature differences. The center of the back is usually the most stable.
Keep Raw Foods Separate
Store the pitcher above or apart from raw meat, fish, and eggs. Use a covered pitcher and a clean shelf to prevent drips and cross-contamination.
Make Room for Chilling Bottles
Reserve a small spot for bottles that are chilling before pooling. A small tray or bin keeps them together and easy to find.
Check the Temperature
Place a thermometer on the shelf where the milk sits. Aim for 40°F (4°C) or colder.
If the reading is warmer, adjust the dial and check again later. Do not trust the built-in display alone.
Keep the Door Closed
Frequent door opening raises the temperature. Plan your fridge trips so you open the door as few times as possible.
A One-Week Trial Plan for Your First Pitcher
Starting small makes the routine easier to learn. Try this plan for your first week.
| Day | Goal | What to focus on |
|---|---|---|
| Day 1 | Set up | Wash and dry the pitcher, buy labels, check the fridge temperature |
| Day 2 | First pooling | Pump, chill, and add two sessions to the pitcher |
| Day 3 | Full day | Pool every session, portion bottles in the evening |
| Day 4 | Freezing | Freeze the extra milk in labeled portions |
| Day 5 | Daycare or partner test | Hand off labeled bottles and review the instructions |
| Day 6 | Fine-tune | Adjust bottle size and portion sizes |
| Day 7 | Review | Note what worked, what wasted milk, and what to change |
What to Track
- How many ounces you pump each day.
- How many ounces your baby drinks.
- How many ounces you freeze.
- Any problems with smell, separation, or spills.
After a week, you will know whether the method fits your life. If it does not, you can switch back to individual bags with no loss.
Frequently Asked Questions (FAQs)
What is the pitcher method for breast milk?
It is a storage method in which chilled milk from several pumping sessions within about 24 hours is pooled in one covered pitcher. You then portion the milk into bottles and freeze any extra.
How do you do the pitcher method for breast milk step by step?
Pump into a clean bottle, label it, and chill it. Pour the cold milk into a labeled pitcher, repeat through the day, then swirl, portion bottles, freeze the rest, and wash the pitcher.
Is the pitcher method safe?
It can be safe for healthy, full-term babies when you follow storage guidelines. Chill milk before combining it, label with the oldest time, keep the pitcher covered and cold, and use the milk within 4 days.
Can I add warm breast milk to cold milk in the pitcher?
The most cautious approach is to chill fresh milk first. The CDC advises combining milk at the same temperature, while some AAP guidance says warm and cold milk can be mixed.
How long can I collect milk in one pitcher?
Plan on about 24 hours. At the end of the day, portion the milk and start a fresh pitcher.
How long does milk from the pitcher last in the fridge?
Up to 4 days, counted from the oldest milk in the pitcher. Label every bottle with that oldest time.
What kind of pitcher should I use?
Use a clean pitcher made of glass or BPA-free plastic with a tight lid. Choose a size that holds your daily output with room to spare.
Should the pitcher go in the fridge door?
No. Store it at the back of the refrigerator, where the temperature is most stable.
Do I need to freeze the pitcher?
No. Never freeze the pitcher itself. Freeze the leftover milk in bags or hard containers instead.
Can I combine milk from different days in the pitcher?
You can, but label with the date of the oldest milk and follow the 4-day limit from that date. Many parents prefer one pitcher per day to keep dates clear.
Can I mix breast milk and formula in the pitcher?
No. Formula and breast milk have different storage rules. Prepare formula separately and combine it with breast milk only right before a feeding.
How much milk should I put in each bottle?
Divide your baby’s daily intake by the number of feedings. Many exclusively breastfed babies take about 2.5 to 4 ounces per bottle, but your pediatrician can guide you.
How do I thaw frozen milk from the pitcher method?
Thaw it in the refrigerator overnight, or hold it under cool or lukewarm running water. Never use a microwave.
How long does thawed breast milk last?
Thawed milk lasts up to 24 hours in the refrigerator. Once it reaches room temperature, use it within 1 to 2 hours.
Can I refreeze breast milk?
No. Never refreeze milk after it has thawed.
What should I do with milk my baby did not finish?
Use it within 2 hours after the baby finishes feeding. After that, discard it.
Does the pitcher method change the nutrition of breast milk?
It does not add or remove nutrients. It blends the differences between sessions, which may even out fat content from bottle to bottle.
Is the pitcher method safe for premature or NICU babies?
Ask your baby’s care team first. Many hospitals have specific rules for combining and handling milk for premature or sick infants.
Why does my stored milk separate?
The cream naturally rises to the top as the milk sits. Swirl it gently to mix it back together.
Why does my breast milk smell soapy?
High lipase activity can cause a soapy or metallic smell. The milk is often safe, but some babies refuse it. A lactation consultant can help.
How do I know if breast milk has gone bad?
A sour or rancid smell or taste means it has spoiled. Milk stored longer than the safe time should also be discarded, even if it smells fine.
Can I use the pitcher method if I only pump once or twice a day?
Yes, but a small container may suit you better. The method works at any volume as long as you chill, label, and store the milk correctly.
How do I travel with milk from the pitcher?
Pour it into bottles or bags and carry them in an insulated cooler with ice packs. The CDC says milk can stay in a cooler for up to 24 hours.
Do I need to warm breast milk?
No. Many babies drink it at room temperature or cold. If you warm it, use warm water and never a microwave.
How should I clean the pitcher?
Wash it with hot, soapy water after each use, rinse well, and air-dry. Sanitize it regularly, and daily if your baby is young or medically vulnerable.
Conclusion
The pitcher method is a simple way to manage pumped milk. Chill each batch, pool it in a clean labeled pitcher for about 24 hours, then portion bottles and freeze the rest.
Remember the rules that keep it safe. Combine milk only at the same temperature, label with the oldest time, keep the pitcher covered at the back of the fridge, and use the milk within 4 days.
Skip the method, or ask your care team first, if your baby is premature, in the NICU, or medically fragile. Follow the guidance from your pediatrician and lactation consultant.
Follow the eleven steps in this guide for a week, and the routine will feel natural. With a little practice, you will spend less time on storage and more time with your baby.

Dilawar Mughal
Founder and editor, First Time Mommy Guide
I research every guide against what the NHS, the AAP and the WHO publish, then write it in plain English — because most new parents are reading with one hand free, not comparing clinical guidelines. I'm not a doctor or a midwife. Every health claim on this site is sourced and linked so you can check it yourself, and anything urgent belongs with your health visitor or GP, not a blog.