General information, not medical advice. Every baby is different — if anything worries you, speak to your midwife, health visitor or GP rather than waiting.
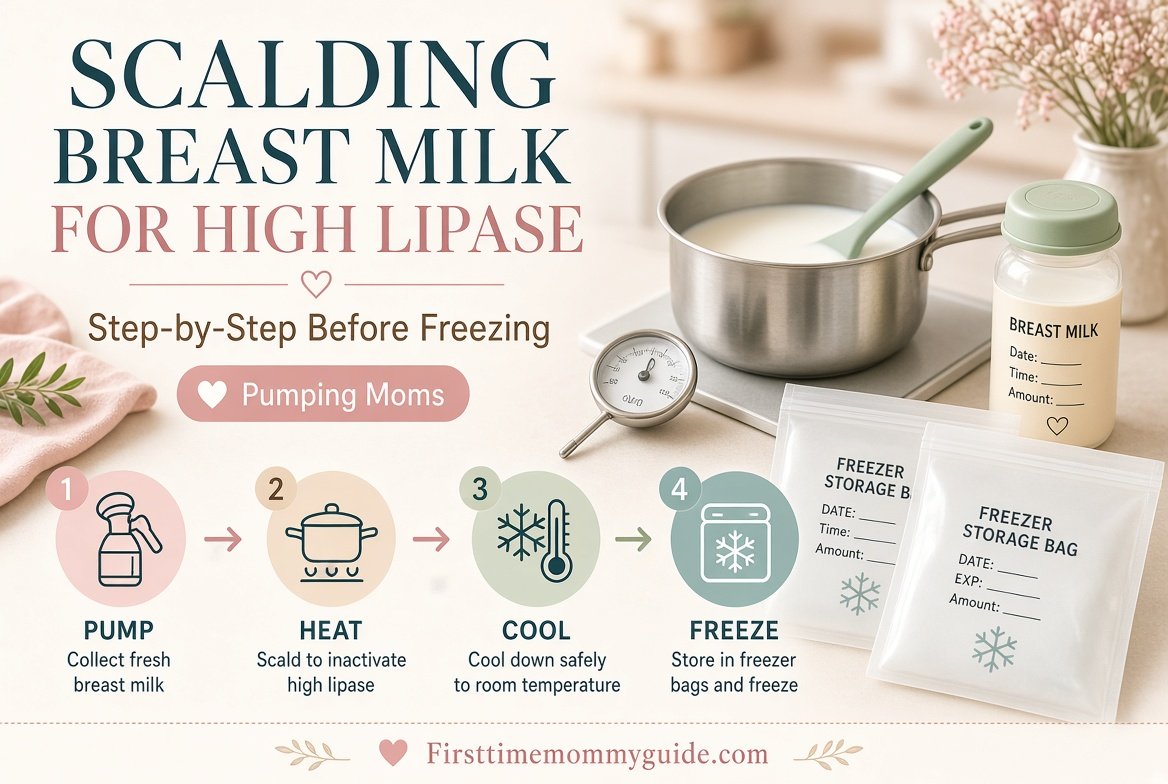
How to Scald Breast Milk for High Lipase Before Freezing? To scald breast milk for high lipase before freezing, you heat freshly pumped milk to about 180°F (82°C), stop just before it boils, cool it fast in an ice bath, and then freeze it in small portions. The heat deactivates lipase, the enzyme that makes stored milk smell soapy, metallic, or sour.
Pour fresh milk into a clean stainless-steel or glass pot. Heat it over medium-low heat while stirring until tiny bubbles form around the edge, at about 180°F (82°C). Remove it from the heat right away, cool it in an ice bath, then pour it into labeled freezer bags and freeze.
High lipase milk is safe for your baby. The only problem is taste and smell, because some babies refuse milk that changed in the fridge or freezer.
Scalding is a tool, not a requirement. Many parents never need it. Others find it saves a whole freezer stash that their baby would otherwise reject.
Table of Contents
Scalding Breast Milk for High Lipase at a Glance
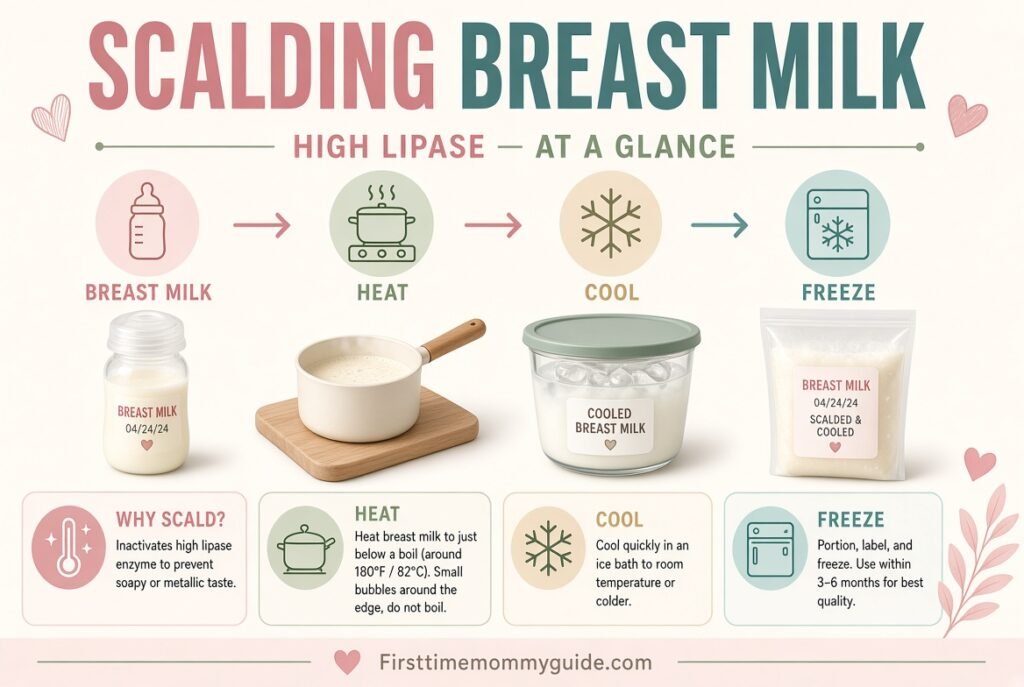
Use this table for a fast overview. Each row is explained in detail later.
| Question | Short answer |
|---|---|
| What is high lipase milk? | Milk in which the fat-digesting enzyme lipase changes the smell and taste during storage |
| Is it safe? | Yes, it is considered safe for healthy babies |
| What does scalding do? | Heat deactivates lipase so the milk keeps its normal taste |
| What temperature? | About 180°F (82°C), with small bubbles at the edge and no full boil |
| How do you cool it? | Quickly, in an ice bath |
| When should you scald? | Soon after pumping, before the milk changes |
| Can you microwave it? | No. Never microwave breast milk |
| Does it fix milk that already smells soapy? | No. It prevents further change |
| Who should ask a professional first? | Parents of premature, NICU, or medically fragile babies |
What Is Lipase in Breast Milk?
Lipase is an enzyme that breaks down fat. Every mother’s milk contains it, and it plays a helpful role in your baby’s digestion.
The enzyme starts working when milk is made. It continues to work during storage, especially in the refrigerator or freezer.
What Lipase Does
Lipase splits milk fat into smaller fatty acids. Those smaller pieces are easier for a baby to absorb.
In most milk, this process is slow and unnoticeable. In milk with high lipase activity, it speeds up and changes the flavor.
Why Stored Milk Changes
When lipase breaks down fat in stored milk, it creates fatty acids with strong smells and tastes. The result can be a soapy, metallic, or sour scent.
The change often shows up after a day or two in the fridge. In some parents, it happens within hours.
What Is High Lipase Milk?
High lipase milk is milk in which this fat breakdown happens faster than usual. It is a natural variation among mothers.
It does not mean something is wrong with you or your milk. Parents of high lipase milk often report that fresh milk smells and tastes completely normal.
Is High Lipase Milk Safe for Babies?
Yes. High lipase milk is generally considered safe. There is no evidence that it harms babies or causes health problems.
The issue is acceptance. Some babies refuse milk that tastes different from what they are used to.
Why It Smells but Is Still Safe
A soapy or metallic smell comes from the fat breaking down in a predictable way. It is a flavor change, not bacterial spoilage.
Spoiled milk has a different smell, closer to sour cow’s milk. The next section explains how to tell them apart.
When to Be Careful
Safety rules for storage still apply. Even high lipase milk must be chilled promptly and used within the time limits set by the CDC.
If milk smells sour or rancid and you are not sure why, throw it out. When in doubt, discard.
How to Tell High Lipase Milk From Spoiled Milk
Both can smell “off,” but the causes and the actions differ. This table helps you decide.
| Feature | High lipase milk | Spoiled milk |
|---|---|---|
| Typical smell | Soapy, metallic, or like fishy or rancid oil | Sour, like spoiled cow’s milk |
| When it appears | After refrigeration or freezing, often within 1 to 2 days | After milk sat too long or too warm |
| Fresh milk smell | Normal | May already be off |
| Safe to feed | Generally yes | No |
| What to do | Test, then scald if needed | Discard |
| Other signs | Baby may refuse it | Milk may taste sour |
A Simple Rule
If the milk was handled correctly and smells soapy, high lipase is likely. If it was left out too long or smells sour, treat it as spoiled and discard it.
If you cannot tell the difference, ask a lactation consultant or your pediatrician.
Rule Out Other Causes First
Before blaming lipase, check a few things.
- Pump parts and bottles are fully rinsed and completely dry.
- No detergent residue is left on collection containers.
- The refrigerator is at 40°F (4°C) or colder.
- Milk goes into the fridge soon after pumping.
- Food odors in the fridge are not seeping in, so use containers with tight lids.
How to Test Your Milk for High Lipase
A quick home test tells you if scalding is worth the effort. Do the test before you freeze a large stash.
The Refrigerator Test
- Pump a small amount of milk into a clean container.
- Keep a small sample in the refrigerator.
- Smell and taste a drop after 24 hours, then again at 48 hours.
- Compare it with a fresh sample from the same day.
If the stored sample smells soapy or metallic while the fresh milk smells normal, you likely have high lipase activity.
The Freezer Test
- Freeze a small portion for a week or two.
- Thaw it in the refrigerator.
- Smell and taste a drop.
If the thawed milk smells different from fresh, lipase may be affecting it.
What Your Results Mean
| What you notice | Likely meaning | Next step |
|---|---|---|
| No change after 24 to 48 hours | Normal lipase activity | Store milk normally |
| Slight change after several days | Mild lipase effect | Use refrigerated milk early or freeze quickly |
| Soapy smell within 24 hours | High lipase | Consider scalding |
| Soapy smell after thawing | Lipase affected frozen milk | Scald future batches before freezing |
| Sour smell | Possible spoilage | Discard and check storage |
Test Before You Build a Large Stash
Many parents learn about high lipase only after freezing hundreds of ounces. Testing early with small samples avoids that heartbreak.
Do the test in the first weeks of pumping if you plan to build a freezer stash.
Do You Need to Scald Your Breast Milk?
Not every parent with high lipase needs to scald. The right choice depends on your baby and your routine.
Scald If
- Your baby refuses stored milk because of the taste.
- You want to freeze a stash for daycare or a return to work.
- Testing shows the smell changes within a day or two.
- You have already lost milk to taste changes.
Skip Scalding If
- Your baby drinks stored milk without any problem.
- You feed mostly fresh milk and have a small stash.
- Your milk smells normal after refrigerating and freezing.
- Your baby is premature or in the NICU and your care team has not approved scalding.
Feed Fresh Milk When You Can
Fresh milk has the highest level of active components. If you exclusively pump or nurse part of the time, feed fresh or recently refrigerated milk first.
Scald only the milk you plan to freeze or store for a longer time.
Decision Guide
| Situation | Suggested approach |
|---|---|
| Baby drinks stored milk happily | No scalding needed |
| Baby refuses stored milk, milk smells soapy | Scald before storing |
| Milk is fresh and fed within a day | No scalding needed |
| Planning a large freezer stash | Test first, then scald if needed |
| Baby is premature or medically fragile | Ask your care team first |
| Not sure what is happening | Ask a lactation consultant |
What Does Scalding Breast Milk Mean?
Scalding means heating milk to just below boiling. For breast milk, the target is about 180°F (82°C).
At that temperature, lipase is deactivated. The enzyme stops breaking down fat, so the milk keeps its normal smell and taste in the fridge and freezer.
Scalding vs Boiling
Boiling happens at 212°F (100°C), and you will see large, rolling bubbles across the surface. Scalding stops well before that point.
You are looking for small bubbles that form around the edge of the pot. That is the signal to take the milk off the heat.
Scalding vs Pasteurizing
Hospital milk banks use a carefully controlled process called Holder pasteurization, which heats milk to a lower temperature for a longer time. Scalding at home is hotter and faster, and it is not the same process.
Do not assume that scalded milk is sterile or that it lasts longer. Handle it as you would any expressed milk.
Why Timing Matters
Scalding stops lipase from acting from that point forward. It does not undo changes that have already happened.
If milk already smells soapy, scalding will not remove the smell. Scald soon after pumping, before the milk changes.
What You Need to Scald Breast Milk
Most items are already in your kitchen. Gather everything before you begin so you can work quickly.
| Item | Purpose | Tips |
|---|---|---|
| Small stainless-steel or glass saucepan | Heats the milk | Choose a small pan so the milk is deep enough to read the temperature |
| Instant-read or candy thermometer | Confirms 180°F (82°C) | Sanitize it before use |
| Clean spoon or silicone spatula | Stirs the milk | Washed and sanitized |
| Large bowl filled with ice and cold water | Cools the milk quickly | Prepare before heating |
| Stainless-steel bowl or heat-safe container | Holds milk in the ice bath | Stainless steel handles temperature changes well |
| Breast milk storage bags or hard containers | Freezing | Cool the milk fully before pouring |
| Labels and marker | Tracking | Write the date and the word “scalded” |
| Oven mitts or a dry towel | Protects your hands | Hot milk can burn |
Cleanliness Comes First
Wash your hands with soap and water. Wash the pot, thermometer, spoon, and bowls in hot, soapy water and rinse well.
Breast milk is not sterile, so clean equipment matters even though you are heating it.
Which Pot Is Best?
Stainless steel is a popular choice. It heats evenly and handles a sudden cool-down well.
Glass also works, but avoid placing a very hot glass container directly into ice water, because the sudden change can crack it. Many parents pour the hot milk into a stainless-steel bowl before cooling.
What to Avoid
- Do not use a microwave.
- Do not use a pot that is too large, because shallow milk is hard to measure.
- Do not use a scratched or dirty pot.
- Do not use plastic containers for very hot milk unless the manufacturer states they are heat safe.
How to Scald Breast Milk for High Lipase Before Freezing: Stovetop Method
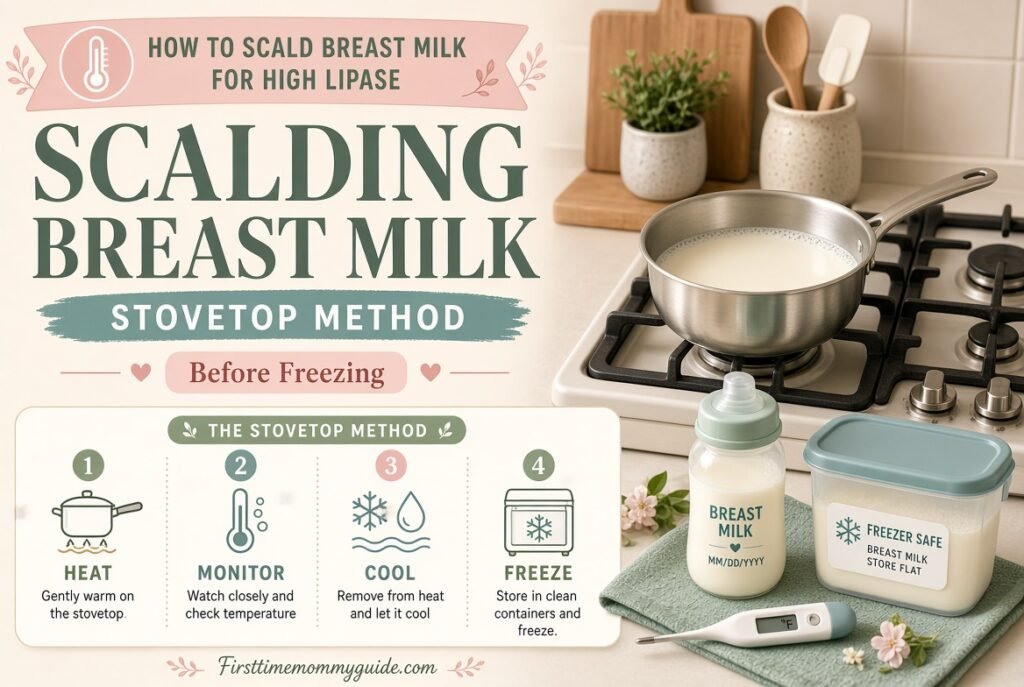
Follow these steps in order. The whole process takes only a few minutes of active time once you have practiced.
Step 1: Prepare Your Station
Fill a large bowl with ice and cold water. Set your freezer bags or containers nearby, with labels ready.
Place your thermometer, spoon, and oven mitts within reach. Preparing first means you can cool the milk the moment it is ready.
Step 2: Start With Fresh Milk
Use freshly pumped milk, or milk that has been in the refrigerator for a very short time. The sooner you scald, the better.
Some parents with very high lipase scald within an hour or two of pumping. Others find that milk kept in the fridge for a day still works. Test what is true for you.
Step 3: Pour the Milk Into the Pot
Pour the milk into your clean saucepan. If you have a small amount, use a small pan so the liquid is deep enough for the thermometer.
Scald in batches that match what you plan to freeze. You do not need to scald milk you will feed within a day.
Step 4: Heat on Medium-Low
Place the pot on the stove over medium-low heat. Stir gently and often with your clean spoon.
Stirring helps the milk heat evenly and prevents a skin from forming. Never leave the pot unattended.
Step 5: Watch for Small Bubbles at the Edge
Look for tiny bubbles forming around the inside edge of the pot. They signal that the milk is approaching 180°F (82°C).
Check the temperature with your thermometer. Do not let it reach a rolling boil.
Step 6: Remove From the Heat Right Away
As soon as you see the bubbles and the thermometer reads about 180°F (82°C), take the pot off the burner. Keep holding it away from the heat.
Do not hold the milk at that temperature. The goal is to reach it briefly and stop.
Step 7: Cool the Milk Quickly in an Ice Bath
Place the pot, or a stainless-steel bowl holding the milk, into the ice bath. Stir to speed cooling.
Cool the milk until it feels cold to the touch. Quick cooling reduces the time the milk spends in a warm range where bacteria can grow.
Step 8: Pour Into Storage Containers
Once the milk is completely cool, pour it into freezer bags or hard containers. Use portions of 2 to 4 ounces.
Leave about one inch of space at the top because milk expands as it freezes.
Step 9: Label the Containers
Write the date and time of pumping on each label. Add the word “scalded” so you and any caregiver know how the milk was treated.
Write the amount in ounces or milliliters if you wish.
Step 10: Freeze Right Away
Lay bags flat on a tray in the freezer. Once they are solid, you can stack them or stand them upright.
Place them at the back of the freezer, away from the door.
Step 11: Clean Everything
Wash the pot, thermometer, spoon, and bowls in hot, soapy water. Rinse and let them air-dry.
Wipe away any milk residue promptly. It can burn onto a pan if left.
Step Summary
| Step | Action | Key point |
|---|---|---|
| 1 | Prepare ice bath and containers | Cool quickly when ready |
| 2 | Start with fresh milk | Scald soon after pumping |
| 3 | Pour into a clean pot | Use a small pan |
| 4 | Heat on medium-low and stir | Never leave it |
| 5 | Watch for bubbles at the edge | About 180°F (82°C) |
| 6 | Remove from heat at once | Do not boil |
| 7 | Cool in an ice bath | Cool fully |
| 8 | Pour into bags or containers | 2 to 4 oz portions |
| 9 | Label with date and “scalded” | Track the oldest milk |
| 10 | Freeze flat | Back of the freezer |
| 11 | Clean up | Wash and dry |
Temperature Guide for Scalding
A thermometer removes guesswork. Use this table as a reference.
| Temperature | What you will see | Meaning |
|---|---|---|
| Below 140°F (60°C) | Warm milk, no bubbles | Not hot enough yet |
| About 160°F (71°C) | Steam, first tiny bubbles | Nearly there |
| About 180°F (82°C) | Small bubbles around the edge | Target scalding point |
| 212°F (100°C) | Rolling boil | Too hot. Take the milk off the heat |
Why Not Just Go by Bubbles?
Bubbles are a helpful clue, but a thermometer gives certainty. Heating methods vary, and visual cues can mislead if the milk is heated too slowly or too fast.
If you do not have a thermometer, rely on the first small bubbles at the edge and remove the milk promptly.
What Happens If It Gets Too Hot?
Milk that boils may form a skin and foam, and it may lose more of its sensitive components. If it boils over, you can also lose milk.
If you overshoot slightly, remove the pot and cool the milk. Slight overheating is not dangerous, but try to stay near 180°F (82°C).
How to Scald Breast Milk Using a Bottle Warmer or Water Bath
Some parents prefer a gentler method than direct heat. These options can work if they reach the right temperature.
Bottle Warmer Method
Some bottle warmers can heat milk to high temperatures, but many models stop at a lower setting. Check your device before using it.
- Place the milk in a clean bottle or jar that fits the warmer.
- Add water to the warmer as directed and start the cycle.
- Insert a clean thermometer into the milk and stir.
- When the milk reaches about 180°F (82°C), remove it immediately.
- Cool it in an ice bath, then store it.
If your warmer cannot reach 180°F (82°C), use the stovetop or water bath method.
Double Boiler Water Bath Method
A water bath heats the milk more gently, which lowers the risk of scorching.
- Fill a pot partway with water and bring it to a simmer.
- Place a clean glass jar or stainless-steel bowl with the milk into the water.
- Stir the milk with a clean spoon and check the temperature.
- Remove the container when the milk reaches about 180°F (82°C).
- Cool it in an ice bath.
This method takes a little longer, but many parents like the control it offers.
Comparing the Methods
| Method | Speed | Control | Best for |
|---|---|---|---|
| Stovetop pot | Fast | Needs close watching | Everyday scalding |
| Bottle warmer | Moderate | Depends on the model | Small amounts, if it reaches 180°F |
| Double boiler water bath | Slower | Gentle and steady | Parents worried about scorching |
| Microwave | Not recommended | Uneven heating | Never use for breast milk |
The Ice Bath: Why Cooling Fast Matters
Speed is part of the safety plan. Warm milk allows bacteria to multiply, so you want to cool it down quickly.
How to Set Up the Ice Bath
Fill a large bowl with equal parts ice and cold water. Make sure the level is high enough to surround most of the pot or container.
Do not let the ice water splash into the milk.
How to Cool the Milk
Place the pot or bowl of hot milk into the ice bath. Stir the milk with a clean spoon so the cold spreads evenly.
Check the temperature. When the milk feels cold, it is ready to portion.
Why Stainless Steel Works Well
Stainless steel conducts heat quickly, so the milk cools faster. It also handles the jump from hot to cold without cracking.
If you use glass, let it cool slightly before placing it in the bath, or pour the milk into a stainless-steel bowl.
Do Not Skip This Step
Leaving hot milk on the counter to cool slowly keeps it in a warm range for too long. Use ice every time.
Freezing Scalded Breast Milk
Once cooled, scalded milk is stored like any other expressed milk. The same rules apply.
Use Small Portions
Freeze milk in amounts your baby usually drinks, often 2 to 4 ounces. Small portions thaw quickly and waste less.
Freeze a few 1-ounce portions for top-ups.
Leave Room for Expansion
Leave about one inch of space in each container. Do not fill bags beyond the fill line.
Remove Air and Freeze Flat
Squeeze out extra air and seal the bag. Lay it flat in the freezer so it freezes evenly and stacks neatly.
Label Clearly
Every bag should show the following.
- The date and time the milk was pumped.
- The amount.
- The word “scalded.”
- Your baby’s name, if the milk goes to daycare.
Do Not Add Warm Milk to Frozen Milk
Always cool scalded milk completely before it goes into the freezer. Never pour warm milk onto already-frozen milk.
Storage Times
Scalding does not give you extra storage time. Use the same CDC limits that apply to any expressed milk.
| Storage location | CDC time limit for freshly expressed milk |
|---|---|
| Room temperature (77°F / 25°C or colder) | Up to 4 hours |
| Insulated cooler with ice packs | Up to 24 hours |
| Refrigerator (40°F / 4°C) | Up to 4 days |
| Freezer (0°F / −18°C) | Within 6 months is best; up to 12 months is acceptable |
Never Refreeze Thawed Milk
Once milk is thawed, it must not go back into the freezer. This applies to scalded milk too.
How to Thaw and Warm Scalded Breast Milk
Thawing scalded milk follows the same safe steps as thawing regular frozen milk. Gentle handling protects quality.
Safe Ways to Thaw
- In the refrigerator overnight. This is the gentlest option.
- Under cool or lukewarm running water. Hold the sealed bag or bottle under the tap.
- In a bowl of warm water. Set the sealed container in the bowl for a few minutes.
What Never to Do
- Never microwave breast milk.
- Never boil thawed milk.
- Never thaw milk on the counter for hours.
- Never refreeze milk after it has thawed.
Time Limits After Thawing
The CDC says thawed milk can stay in the refrigerator for up to 24 hours. Once warmed to room temperature, use it within 1 to 2 hours.
After a baby starts a feeding, use the milk within 2 hours. Discard any leftovers after that.
Swirl, Do Not Shake
Frozen and scalded milk may separate into a cream layer and a thinner layer. Swirl the bottle gently to mix them.
Separation is normal and does not mean the milk is spoiled.
Does Scalded Milk Look Different?
Scalded milk can look slightly different from fresh milk. You may notice a thin layer of cream or a small change in color.
These are normal. Smell it and check that it is fresh, with no sour odor.
When to Scald: Timing Makes the Difference
Lipase starts working as soon as milk is stored, so the best time to scald is early. The right window depends on how active your lipase is.
Scald Fresh Milk
For most parents, scalding right after pumping works best. The milk has not had time to change.
Cool it quickly and freeze it the same day.
Scald After a Short Fridge Stay
Some parents with moderate lipase can wait a day or two. A short rest in the refrigerator may be fine if the milk still smells normal.
Test your own pattern. If milk smells soapy before you scald it, you have waited too long.
Do Not Scald Milk That Already Smells Soapy
Scalding stops further change but does not remove a flavor that has formed. Milk that already smells soapy will likely still smell soapy after heating.
Offer it mixed into another food if your baby is older, or use it for other purposes.
Timing Table
| When you scald | What to expect |
|---|---|
| Within hours of pumping | Best chance of preserving normal taste |
| After 24 hours in the fridge | Works for some milk, not for very high lipase |
| After 48 hours or more | May already have changed |
| After freezing and thawing | Will not fix the existing smell |
Match the Plan to Your Pumping Routine
If you pump seven times a day, you can scald once in the evening for the day’s milk, as long as the milk was chilled and still smells fresh. If your milk changes within hours, scald each batch soon after pumping.
Scalded Milk and Freezer Stash Planning
Scalding takes extra effort, so use it where it counts. A smart plan saves time and milk.
Feed Fresh First
Give your baby fresh milk whenever you can. This does not need scalding and keeps the natural enzymes intact.
Scald Only for the Freezer
Scald the portion you plan to freeze. This is the milk most exposed to lipase over time.
Start With a Small Test Batch
Scald and freeze a small amount first. Thaw it after a week and check the smell and taste, and see whether your baby accepts it.
If the test succeeds, scale up.
Build the Stash Gradually
Add a few ounces each day. You do not need to scald everything at once.
Example Weekly Plan
| Day | Action |
|---|---|
| Monday | Pump, scald 6 oz, ice bath, freeze in 2 bags |
| Tuesday | Pump, feed fresh, scald 4 oz for the freezer |
| Wednesday | Same as Tuesday |
| Thursday | Thaw a test bag and check smell and taste |
| Friday | Adjust the plan based on the test |
| Weekend | Scald a larger batch if the test went well |
Using the Pitcher Method With High Lipase Milk
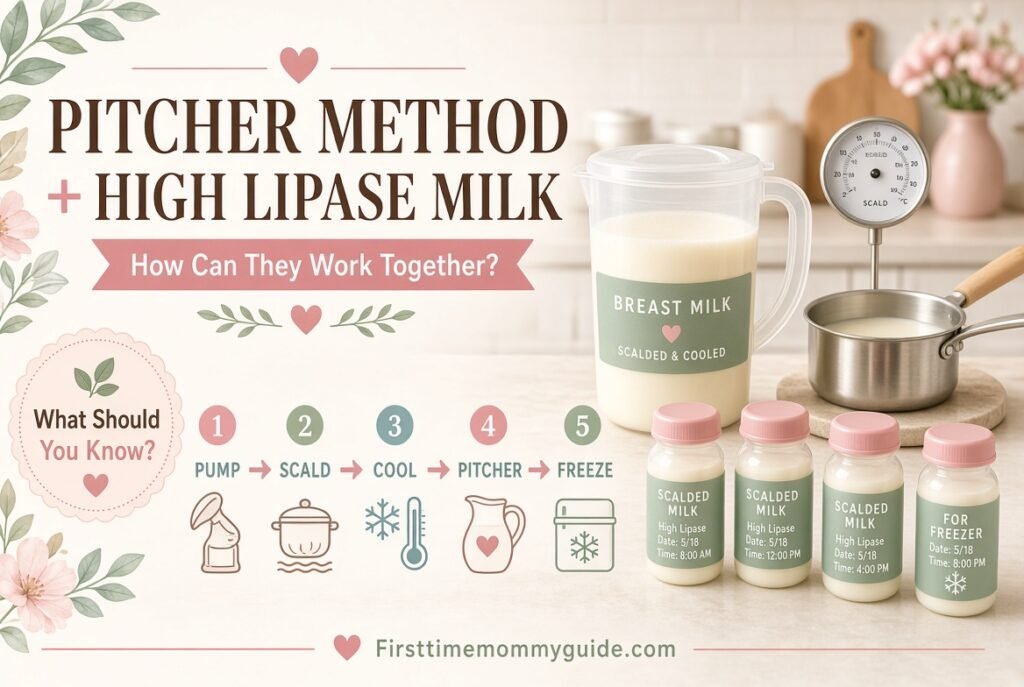
The pitcher method pools chilled milk for about 24 hours. High lipase milk can change during that time, so the pitcher method needs care.
For a full explanation of the pitcher method itself, see the step-by-step pitcher method guide.
The Challenge
If your milk turns soapy within a day, a pitcher that collects 24 hours of chilled milk may already have changed by evening.
Options That Work
- Scald each pumping session soon after it is pumped, cool it, and then add the cooled milk to the pitcher.
- Skip the pitcher method and store small portions instead.
- Use the pitcher only for milk you will feed within a day.
Keep Records
Label the pitcher with the date and time of the oldest milk and note that it contains scalded milk. This keeps caregivers informed.
Does Scalding Destroy Nutrients?
This is a fair concern. Heat changes some parts of breast milk, and the effect depends on temperature and time.
What Heat Can Affect
Some of the milk’s active protective components, such as certain antibodies, enzymes, and immune proteins, are sensitive to heat. Higher temperatures reduce them more.
Scalding to about 180°F (82°C) is hotter than the process used by hospital milk banks, so it may reduce these components more.
What Heat Does Not Remove
Breast milk’s main building blocks, including fat, protein, carbohydrates, and many vitamins and minerals, remain in the milk. Scalded milk still provides nutrition.
The Practical View
Many lactation professionals present scalding as a reasonable option when the alternative is a baby who refuses stored milk. Fresh milk remains the best choice when possible.
If you are concerned, ask your pediatrician or lactation consultant how this applies to your baby’s age and health.
Reduce Your Heat Exposure
- Remove the milk as soon as it reaches the target.
- Cool it right away.
- Scald only the milk that needs it.
- Offer fresh milk whenever you can.
Who Needs Extra Caution
Premature babies and babies with medical conditions benefit most from the protective components of milk. Ask your care team before scalding any milk meant for them.
Will My Baby Accept Scalded Milk?
Most babies take scalded milk without trouble. Some notice a slightly different taste, since heating can create a mild cooked flavor.
Why Acceptance Varies
Babies differ in how sensitive they are to flavor. A baby used to fresh milk may react to any change, while another will not mind.
Tips to Help Your Baby Accept It
- Offer a small amount mixed with fresh milk.
- Warm the bottle gently, since temperature can affect acceptance.
- Try a different nipple flow.
- Offer the bottle when your baby is calm and mildly hungry, not frantic.
- Ask a caregiver to offer the bottle, since some babies refuse a bottle from their mother.
If Your Baby Still Refuses
Check whether the issue is the milk or the bottle. Babies refuse bottles for many reasons, including nipple type, feeding position, and teething.
A lactation consultant can help you sort it out.
Alternatives for Older Babies
Once your baby starts solids, you can use high lipase milk in oatmeal, pancakes, or purees. Some parents also add milk to warm baths for skin comfort, though this is a personal choice, not a medical treatment.
Alternatives to Scalding
Scalding is one option among several. Choose the one that fits your situation.
| Option | How it works | Pros | Cons |
|---|---|---|---|
| Feed fresh milk | Avoids storage altogether | No effort, full nutrition | Not always practical |
| Freeze quickly | Limits time in the fridge before freezing | Simple | May not be enough for very high lipase |
| Mix with fresh milk | Dilutes the changed flavor | Easy | Not always enough |
| Use in food (older babies) | Hides taste in cereals or purees | Uses stored milk | Only for babies eating solids |
| Scald | Deactivates lipase | Prevents taste change | Extra effort, heat may reduce some components |
| Ask about donation | Some programs may accept stored milk | Helps others | Policies vary, so ask your local milk bank |
Freeze Fast
If you plan to freeze, cool the milk quickly and move it to the freezer soon after pumping. Some parents with mild lipase find this is enough.
Test your own milk to see if it works.
Scalding vs Doing Nothing
Doing nothing is a fine choice if your baby drinks the milk. If your baby refuses stored milk or you worry about wasting a stash, scalding is worth trying.
Scalding Milk You Already Froze
Many parents discover the problem after freezing a big stash. You still have options.
Can You Scald Frozen Milk?
You can thaw milk and scald it, but the existing smell and taste will not go away. Scalding only stops further change.
Never refreeze milk after it has been thawed, so plan to use the scalded milk within the thawed milk time limit.
What to Do With a Large Stash That Smells Soapy
- Taste a small amount to confirm it is soapy and not sour.
- Try mixing it with fresh milk in a bottle.
- Use it in food once your baby eats solids.
- Check with a local milk bank about whether they can accept it.
- If the smell is sour or you are unsure, discard it.
Protect Future Batches
Test small samples before you freeze again. Scald future batches soon after pumping if needed.
Common Mistakes When Scalding Breast Milk
A few errors cause most of the problems. Review this list before you start.
| Mistake | Why it is a problem | Fix |
|---|---|---|
| Boiling the milk | Heats beyond what is needed and risks overflow | Stop at small bubbles, about 180°F (82°C) |
| Using the microwave | Creates hot spots and burns | Use a stove, water bath, or warmer |
| Waiting too long to scald | Milk has already changed | Scald soon after pumping |
| Not cooling fast | Milk stays warm and bacteria can grow | Use an ice bath |
| Pouring hot milk into freezer bags | Can damage bags and affect safety | Cool completely first |
| Skipping the test | You may scald milk that does not need it | Test small samples first |
| Forgetting to label | You cannot track age or treatment | Add date, time, and “scalded” |
| Overfilling bags | Bags leak or burst in the freezer | Leave one inch of space |
| Using a dirty pot | Introduces bacteria | Wash and sanitize equipment |
| Walking away from the stove | Milk can boil over or scorch | Stay with the pot |
The Most Common Mistake
Waiting until the milk smells soapy before scalding. At that point, the change has occurred.
The Riskiest Mistake
Skipping the ice bath. Slow cooling leaves milk in a warm range. Always cool quickly.
Safety Rules for Scalding Breast Milk
Heating liquid to near boiling carries a burn risk, and storing milk carries a food safety risk. Take both seriously.
Burn Prevention
- Keep children and pets away from the stove.
- Use oven mitts when you handle the pot.
- Turn the pot handle inward so it cannot be bumped.
- Never leave hot milk unattended.
- Use a stable, heat-safe surface for the ice bath.
Food Safety
- Wash your hands before you begin.
- Use clean, sanitized equipment.
- Cool milk quickly and store it right away.
- Follow the CDC storage times.
- Discard milk with a sour smell or taste.
Do Not Test Temperature by Touch
Milk near 180°F (82°C) will burn skin. Use a thermometer, not your finger.
Cooling Safety
Be careful when you move hot milk to the ice bath. Set the container down gently and avoid splashes.
Do Not Heat in a Baby Bottle on the Stove
Do not heat milk directly in a baby bottle on a burner. Use a pot or a water bath with a proper container.
Scalding for Premature, NICU, and Medically Fragile Babies
The rules differ for babies with special health needs. Their milk is handled with extra care.
Ask Before You Scald
Hospitals often give parents exact instructions for pumping, storing, and transporting milk. Some units do not allow parents to heat milk at home.
Heat reduces some of the protective components that preterm babies benefit from most.
Talk to Your Care Team
If your baby refuses stored milk or you suspect high lipase, tell the neonatal team or a lactation consultant. They can advise you based on your baby’s needs.
Do Not Copy Hospital Methods at Home
Hospitals use specific equipment and temperature controls. Home scalding is not the same process.
Myths and Facts About High Lipase and Scalding
Online advice mixes helpful tips with guesses. These corrections can help.
| Myth | Fact |
|---|---|
| High lipase milk is dangerous | It is generally considered safe |
| High lipase means something is wrong with you | It is a natural variation among mothers |
| Scalding fixes milk that already smells soapy | It prevents further change but does not remove an existing smell |
| Scalded milk lasts longer | Use the standard storage limits |
| You must boil the milk | Boiling is not needed. Stop at small bubbles |
| A microwave is faster and fine | Never microwave breast milk |
| Every parent should scald | Only parents whose milk changes and whose baby refuses it |
| Diet changes lipase levels | No known food changes it, according to lactation sources |
| Soapy milk is always spoiled | It may be lipase. Sour milk is the true warning sign |
Troubleshooting Scalded Milk
Problems can still come up after you scald. Here is how to solve the most common ones.
The Milk Still Smells Soapy After Scalding
The milk may have changed before you scalded it. Next time, scald sooner after pumping.
Also check that you reached about 180°F (82°C). Milk heated too lightly may keep some lipase activity.
The Milk Smells Sour
A sour smell points to spoilage, not lipase. Discard the milk and review your storage steps.
Check your fridge temperature, your cooling speed, and the cleanliness of your equipment.
The Milk Smells Burnt or Scorched
The milk stuck to the bottom of the pot or got too hot. Use medium-low heat, stir often, and consider a water bath.
The Milk Formed a Skin
A thin skin can form when milk is heated without stirring. Stir throughout the heating process and skim the skin off if it forms.
The Milk Foamed or Boiled Over
You used too much heat or walked away. Lower the heat and stay at the stove.
The Bag Leaked in the Freezer
The bag was overfilled, or the milk was not fully cooled. Leave one inch of space and cool completely before pouring.
My Baby Still Refuses the Milk
The cause may not be lipase. Check nipple flow, bottle temperature, feeding position, and your baby’s mood.
Try mixing scalded milk with fresh milk, or ask a lactation consultant.
Quick Troubleshooting Table
| Problem | Likely cause | Solution |
|---|---|---|
| Still soapy after scalding | Scalded too late or not hot enough | Scald sooner and confirm 180°F |
| Sour smell | Spoilage | Discard and review storage |
| Burnt smell | Heat too high | Use medium-low heat or a water bath |
| Skin on the milk | No stirring | Stir often |
| Boil-over | Heat too high | Lower the heat and stay at the stove |
| Leaking bags | Overfilled or warm milk | Leave headspace and cool first |
| Baby refuses | Taste or bottle issue | Mix with fresh milk and check bottle factors |
Scalding for Exclusive Pumpers
Exclusive pumpers produce the most milk, so lipase problems cost them the most. A clear routine saves effort.
Use Fresh Milk Daily
Feed fresh or short-term refrigerated milk for current feedings. Reserve scalding for milk that will go to the freezer.
Scald in One Daily Session
Choose a regular time to scald and freeze, such as after the last pump of the day. Gather milk that is still fresh and has been chilled promptly.
If your milk changes quickly, scald after each pump or after every second session.
Track What You Do
Keep a small notebook or phone note with the date, ounces scalded, and ounces frozen. A record helps you manage your stash.
Use a Dedicated Scalding Setup
Keep a small pot, a thermometer, and a stainless-steel bowl for scalding in one place. A ready station makes the habit easier.
Scalding for Working Moms and Daycare
Returning to work often means building a stash. Plan ahead so daycare bottles are accepted.
Pump, Chill, Then Scald at Home
Pump at work into clean bottles and chill them in a refrigerator or an insulated cooler with ice packs. At home, scald the milk you plan to freeze.
The CDC says milk can stay in an insulated cooler with ice packs for up to 24 hours, but earlier is better for high lipase milk.
Tell Your Caregiver
Give your daycare a short note.
- Label bottles with the baby’s name, date, and time.
- Mention that some milk is scalded.
- Ask them to warm bottles in a bowl of warm water, never a microwave.
- Ask them to discard milk left 2 hours after a feeding.
Test Daycare Bottles Early
Send a small amount first. Make sure your baby accepts the milk and the bottle before the first full day.
Plan Your Daily Bottles
Count how many ounces your baby usually drinks. Divide the total by the number of feedings to find the bottle size.
For example, 24 ounces across 8 feedings means about 3 ounces per bottle.
Equipment Care for Scalding
Clean equipment protects your milk. A short routine keeps everything ready.
Wash After Each Use
Wash the pot, spoon, thermometer, and bowls in hot, soapy water. Rinse and air-dry.
Sanitize Regularly
The CDC advises sanitizing pump parts and feeding equipment at least once daily for babies younger than about three months, premature babies, or babies with a weakened immune system.
For scalding gear, sanitizing is a good habit for any age.
Clean the Thermometer Carefully
Wipe it with hot, soapy water and rinse. Do not submerge it unless it is waterproof.
Store Items Together
Keep your scalding tools in one bin or drawer. This saves time and helps you maintain a clean routine.
Equipment Checklist for Scalding Day
| Item | Ready? |
|---|---|
| Clean small stainless-steel or glass pot | |
| Sanitized thermometer | |
| Clean spoon or spatula | |
| Large bowl with ice and cold water | |
| Stainless-steel bowl for cooling | |
| Freezer bags or hard containers | |
| Labels and marker | |
| Oven mitts or towel | |
| Space at the back of the freezer |
Step-by-Step Example: Scalding 8 Ounces for the Freezer
A worked example helps you see the whole process. This one follows a parent who pumped 8 ounces and wants to freeze it.
The Setup
The parent washes her hands, sanitizes a small stainless-steel pot, and fills a large bowl with ice and water. She labels three freezer bags.
The Heating
She pours 8 ounces into the pot and heats it on medium-low, stirring. After several minutes, small bubbles appear at the edge. The thermometer reads about 180°F (82°C).
The Cooling
She removes the pot from the heat and sets it into the ice bath. She stirs until the milk is cold.
The Freezing
She pours the milk into three bags, using about 2.7 ounces in each. She leaves an inch of space, squeezes out the air, and labels each bag with the date, time, and “scalded.”
She lays the bags flat in the freezer.
The Result
A week later, she thaws one bag in the refrigerator and checks the smell. If it smells like fresh milk, she knows her process works.
Quick Math for Portions
| Total milk | Bags | Ounces per bag |
|---|---|---|
| 4 oz | 2 | 2 oz |
| 6 oz | 2 | 3 oz |
| 8 oz | 2 | 4 oz |
| 8 oz | 3 | About 2.7 oz |
| 12 oz | 4 | 3 oz |
Ounces to Milliliters
Use this table if your containers are marked in milliliters.
| Ounces | Approximate milliliters |
|---|---|
| 1 oz | 30 mL |
| 2 oz | 59 mL |
| 3 oz | 89 mL |
| 4 oz | 118 mL |
| 6 oz | 177 mL |
| 8 oz | 237 mL |
Temperature Conversions for Heating and Storing Milk
Different tools use different scales. This table keeps the key numbers in one place.
| Reference point | Fahrenheit | Celsius |
|---|---|---|
| Freezer | 0°F | −18°C |
| Refrigerator | 40°F | 4°C |
| Room temperature limit for storage | 77°F | 25°C |
| Scalding target | 180°F | 82°C |
| Boiling | 212°F | 100°C |
Quick Reference Cheat Sheet
Keep this where you can see it on scalding day.
| Topic | Rule |
|---|---|
| Target temperature | About 180°F (82°C) |
| Visual cue | Small bubbles around the edge, no rolling boil |
| Heat | Medium-low, stirring often |
| After heating | Remove from the heat right away |
| Cooling | Ice bath until cold |
| Portions | 2 to 4 ounces |
| Headspace | About one inch |
| Labels | Date, time, amount, and “scalded” |
| Freezer life | 6 months is best; up to 12 months is acceptable |
| Fridge life | Up to 4 days for freshly expressed milk |
| Thawed milk | Use within 24 hours in the fridge; never refreeze |
| After a feeding starts | Use within 2 hours |
| Microwave | Never |
Daily Checklist
Use this list to stay organized.
Before You Scald
- Wash your hands.
- Sanitize the pot, thermometer, and spoon.
- Prepare the ice bath.
- Label the freezer bags.
While You Scald
- Heat on medium-low and stir.
- Watch for small bubbles at the edge.
- Check for about 180°F (82°C).
- Remove from the heat immediately.
After You Scald
- Cool in the ice bath.
- Pour into bags or containers.
- Label and freeze flat.
- Wash and dry your equipment.
When to Talk to a Professional
Home scalding is a practical tool, but some situations call for expert help.
Ask Your Pediatrician If
- Your baby is premature or has a medical condition.
- Your baby refuses all stored milk and is not feeding well.
- Your baby seems ill after drinking stored milk.
- You are unsure whether your baby is getting enough milk.
See a Lactation Consultant If
- You suspect high lipase and want help confirming it.
- Your baby refuses the bottle.
- Pumping is painful or your supply is dropping.
- You need a plan for building a stash.
Seek Urgent Care If
Your baby has a fever, vomiting, diarrhea, trouble breathing, extreme sleepiness, or signs of dehydration, such as very few wet diapers.
This guide offers general education based on common lactation practice and CDC storage guidance. It does not replace advice from your baby’s health care provider.
Where the Guidance Comes From
Reliable sources protect your baby. These are the main ones behind the advice here.
| Source | What it provides |
|---|---|
| Centers for Disease Control and Prevention (CDC) | Storage times, temperatures, hygiene, thawing rules |
| Lactation consultants (IBCLCs) | Practical guidance on high lipase milk and scalding |
| Academy of Breastfeeding Medicine (ABM) | Clinical protocols on human milk storage |
| American Academy of Pediatrics (AAP) | Guidance on infant feeding and milk handling |
| La Leche League and WIC | Community breastfeeding support |
A Note on Evidence
Research on home scalding is limited. Most advice comes from lactation professionals and parent experience. That is why this guide leans toward cautious steps and asks you to test, observe, and consult a professional when your baby is vulnerable.
Why Some Mothers Have Higher Lipase Activity
Lipase levels differ from mother to mother, and the reason is not fully understood. It is a natural variation, like many other features of breast milk.
What Is Known
Every mother’s milk contains lipase. Some mothers’ milk breaks down fat faster once it is stored.
Lactation sources say that no known food or supplement changes the amount of lipase in milk. So there is nothing you did to cause it, and nothing you can eat to prevent it.
What Is Not Known
Researchers have not pinned down exactly why activity varies. It also may differ from one baby to the next for the same mother.
Some parents notice the pattern with one child but not with another.
Can It Change Over Time?
Some parents report that the smell changes as their baby grows. Milk composition does shift over the months of breastfeeding.
If you tested your milk early and found no problem, it is still worth re-checking a small sample if your baby suddenly refuses stored milk.
What This Means for You
You cannot prevent high lipase, but you can manage it. Testing, quick storage, and scalding give you reliable options.
Practical Tips for Storing High Lipase Milk Without Scalding
Scalding is not the only route. If your lipase is mild, simpler habits may be enough.
Chill Immediately
Place freshly pumped milk in the refrigerator or a cooler with ice packs right after pumping. Avoid leaving it on the counter.
Freeze Soon
If you plan to freeze, do it within a day, not on day four. The longer milk sits in the fridge, the more lipase can act.
Store in Small Portions
Freeze 2 to 4 ounces at a time. Thaw only what you need.
Rotate Your Stash
Use the oldest milk first. Check a bag every few weeks to see how the smell is holding up.
Combine Strategies
Many parents mix approaches. They feed fresh milk during the day, freeze small portions quickly, and scald only the milk for long-term storage.
Questions to Ask a Lactation Consultant
A lactation consultant (IBCLC) can help you decide whether scalding is right for you. These questions make the visit productive.
- Does my milk smell and taste like high lipase milk, or could another issue be involved?
- How soon after pumping should I scald my milk?
- Is scalding appropriate for my baby’s age and health?
- How can I help my baby accept the bottle?
- How large a freezer stash do I really need?
- Are there other causes for my baby’s refusal, such as bottle flow or feeding position?
What to Bring
Bring a sample of stored milk, your pumping log, and a list of what you have tried. If possible, bring your baby so the consultant can watch a bottle feeding.
Final Pre-Scald Checklist
Run through this list before your first batch.
| Check | Done? |
|---|---|
| I tested a small sample and saw a soapy or metallic change | |
| I ruled out unclean parts and a warm fridge | |
| My baby is healthy and full-term, or my care team approved scalding | |
| I have a thermometer, a small pot, and an ice bath ready | |
| I know the target of about 180°F (82°C) and will not boil | |
| My freezer bags are labeled and my freezer is at 0°F (−18°C) |
If every box is checked, you are ready. Start with one small batch, test it after a week, and adjust.
Frequently Asked Questions (FAQs)
How do you scald breast milk for high lipase before freezing?
Heat fresh milk in a clean pot over medium-low heat, stirring, until small bubbles form at the edge, about 180°F (82°C). Remove it from the heat, cool it in an ice bath, then pour it into labeled freezer bags and freeze.
What temperature should I scald breast milk?
Aim for about 180°F (82°C). Stop when you see small bubbles around the edge, and never let the milk reach a rolling boil.
Is high lipase breast milk safe for my baby?
Yes. High lipase milk is generally considered safe. The only issue is that some babies dislike the taste.
How do I know if I have high lipase milk?
Store a small sample in the refrigerator and smell it after 24 and 48 hours. If it turns soapy or metallic while fresh milk smells normal, high lipase is likely.
What does high lipase milk smell like?
It often smells soapy, metallic, or like rancid oil. Spoiled milk usually smells sour, like spoiled cow’s milk.
Does scalding fix milk that already smells soapy?
No. Scalding stops lipase from changing the milk further, but it does not remove an existing smell. Scald soon after pumping.
When should I scald breast milk?
Scald fresh milk soon after pumping, before the milk has time to change. Some milk can wait a day in the fridge, but test your own pattern.
Do I have to scald all my breast milk?
No. Feed fresh milk whenever possible and scald only the milk you plan to store, especially for the freezer.
Can I boil breast milk instead of scalding it?
No. Boiling heats the milk beyond what is needed and risks boil-over and greater loss of milk components. Stop at small bubbles near 180°F (82°C).
Can I scald breast milk in the microwave?
No. Never microwave breast milk. It heats unevenly and can create hot spots that burn a baby’s mouth.
Why do I need an ice bath?
Fast cooling shortens the time the milk spends in a warm range where bacteria can grow. It also prepares the milk for the freezer.
Can I use a bottle warmer to scald milk?
Only if the warmer reaches about 180°F (82°C). Many do not, so check your model or use the stovetop or water bath method.
Does scalding kill nutrients in breast milk?
Heat reduces some sensitive protective components, but fat, protein, carbohydrates, and many vitamins and minerals remain. Fresh milk is still best when possible.
Does scalded milk last longer?
No. Follow the usual CDC limits: up to 4 days in the fridge, and 6 months in the freezer for best quality.
Can I scald milk after it has been frozen?
You can thaw and scald it, but any existing soapy smell will remain. Never refreeze thawed milk.
Will my baby accept scalded milk?
Most babies do. A few notice a slight cooked taste. Mixing it with fresh milk can help.
Can I mix scalded milk with fresh milk?
Yes, as long as both are at the same temperature when combined and you follow storage rules. Label the batch with the oldest time.
What is the best pot for scalding?
A small stainless-steel pot works well. Glass also works, but avoid placing very hot glass directly into ice water.
How much milk can I scald at once?
Scald the amount you plan to freeze, in a pot where the milk is deep enough to measure. Small batches heat faster and more evenly.
Should I label scalded milk?
Yes. Write the date, time pumped, amount, and the word “scalded” so you and any caregiver know how it was handled.
Can I use the pitcher method with high lipase milk?
It can work if you scald and cool milk before adding it, or if you use the pitcher only for milk you will feed within a day. Lipase can change pooled milk over 24 hours.
Is scalding safe for premature or NICU babies?
Ask your baby’s care team first. Heat reduces some protective components, and hospitals often have specific rules for handling milk.
What if my milk smells sour instead of soapy?
Sour milk is likely spoiled. Discard it and check your storage steps.
Can I use high lipase milk for something else?
Parents sometimes mix it into solid foods for older babies. If you have a large stash, ask a local milk bank whether they can accept it.
Does diet change lipase levels?
No known food changes lipase levels in breast milk, according to lactation sources. Check your pump parts and storage steps instead.
Conclusion
To scald breast milk for high lipase before freezing, heat fresh milk to about 180°F (82°C), stop at small bubbles, cool it in an ice bath, and freeze it in labeled portions. The heat deactivates lipase so the milk keeps its normal taste.
Test first so you scald only when you need to. Scald soon after pumping, never boil, never use a microwave, and cool quickly.
Remember that high lipase milk is safe, and scalding does not extend storage times. Follow the CDC limits and ask your care team before scalding milk for a premature or medically fragile baby.
Start with a small test batch, check the smell after a week, and build your stash from there. With a simple routine, you can protect your milk and keep your baby feeding well.

Dilawar Mughal
Founder and editor, First Time Mommy Guide
I research every guide against what the NHS, the AAP and the WHO publish, then write it in plain English — because most new parents are reading with one hand free, not comparing clinical guidelines. I'm not a doctor or a midwife. Every health claim on this site is sourced and linked so you can check it yourself, and anything urgent belongs with your health visitor or GP, not a blog.