General information, not medical advice. Every baby is different — if anything worries you, speak to your midwife, health visitor or GP rather than waiting.
Every bottle your baby drinks from needs to be clean — and for the first year, it needs to be sterile too. A newborn's immune system is still learning to fight germs, and milk is the perfect breeding ground for bacteria. A bottle that looks clean can still carry enough bacteria to make a baby ill, which is why health authorities around the world recommend sterilising bottles, teats, and all feeding equipment until your baby is at least twelve months old.
The good news is that cleaning and sterilising baby bottles is simple once you have a routine. It takes about ten minutes a day, and the right method depends on your kitchen, your budget, and how many bottles you use. This guide walks you through every step: how to wash bottles properly, the four sterilising methods and which one suits you, how to dry and store bottles safely, how often to sterilise, when you can stop, and the mistakes that catch out even experienced parents. Guidance here follows the NHS Start for Life advice, the American Academy of Pediatrics (AAP), and the Centers for Disease Control and Prevention (CDC).
Key Takeaways
- Wash first, then sterilise. Sterilising a dirty bottle does not work — milk residue protects bacteria from heat and chemicals.
- Sterilise all feeding equipment until your baby is 12 months old, including bottles, teats, caps, rings, and breast pump parts that touch milk.
- Boiling, steam, microwave, and cold-water sterilising all work when done correctly. Choose the method that fits your kitchen and your routine.
- Always wash your hands before handling clean bottles, and clean the bottle brush and washing-up bowl regularly — they can harbour bacteria too.
- Air-dry bottles upside down on a clean rack. Towel-drying can transfer germs back onto sterile equipment.
- Discard unfinished formula after one hour. Never save a half-finished bottle for the next feed.
- Replace teats regularly — every two to three months, or sooner if they are cracked, torn, sticky, or the flow has changed.
Why Cleaning and Sterilising Baby Bottles Matters
A baby's immune system is immature for the first year of life. Bacteria that an adult would fight off without noticing can cause vomiting, diarrhea, and serious infections in a baby. One bacterium, Cronobacter sakazakii, is rare but can cause severe illness in newborns, and it has been linked to contaminated formula and feeding equipment. Thorough cleaning and sterilising dramatically reduces this risk.
Milk — whether breast milk or formula — is rich in nutrients, warmth, and moisture. That combination is exactly what bacteria need to multiply. A bottle left with milk residue at room temperature can grow large numbers of bacteria within a couple of hours. Even a bottle rinsed with water still holds a thin film of milk in the teat, the screw ring, and the corners of the bottle. That film feeds bacteria between feeds.
Sterilising kills the bacteria that washing alone can miss. Washing with hot soapy water removes most germs and all visible milk residue, but it does not kill everything. Sterilising — using heat or a chemical solution — kills the remaining bacteria and viruses. That is why the two steps work as a pair: wash first to remove the milk, then sterilise to kill the germs.
Babies are most vulnerable in the first three months, and premature babies and babies with weakened immune systems are at higher risk still. For these babies, strict sterilising is especially important, and your doctor may advise extra precautions. Our guide to the newborn feeding schedule explains how often newborns feed — and therefore how often bottles need to be ready.
What You Need Before You Start
You do not need expensive equipment to clean and sterilise bottles safely. A basic setup costs very little, and many parents already own most of it.
Essential equipment:
- A dedicated bottle brush with a small teat brush, or a bottle-cleaning sponge
- Washing-up liquid (a mild, fragrance-free one is best)
- A clean washing-up bowl used only for baby feeding equipment — not the family sink, which can carry food bacteria
- A clean drying rack or a clean tea towel on a draining board
- Your chosen steriliser: a large saucepan with a lid for boiling, an electric steam steriliser, a microwave steam steriliser, or a cold-water sterilising unit with tablets or liquid
- Sterilising solution or tablets if you use the cold-water method
- Tongs, if you boil or steam, to lift hot equipment out safely
Helpful extras:
- A bottle drying rack with pegs, which keeps bottles upright and ventilated
- A small bottle brush for narrow-neck bottles
- Spare teats and bottles, so you always have a clean one ready
- A clean, lidded container for storing sterilised equipment
Buy enough bottles to cover a full day plus a couple of spares. Most parents find six to eight bottles comfortable for a formula-fed baby, and fewer if you are mostly breastfeeding and only using bottles occasionally. Having spares means you can sterilise in one batch a day instead of rushing to sterilise a single bottle while your baby cries for a feed.
How to Clean Baby Bottles: Step by Step
Cleaning comes first, every time, before any sterilising method. A steriliser cannot do its job on a bottle that still has milk residue inside it.
Step 1: Wash your hands and prepare
Wash your hands thoroughly with soap and water and dry them on a clean towel. Clean the work surface and the washing-up bowl. Fill the bowl with hot water and a small amount of washing-up liquid. Never wash baby bottles in the family sink alongside greasy dishes — use the dedicated bowl.
Step 2: Take the bottle apart completely
Unscrew the bottle and separate every part: the bottle, the teat, the screw ring, the cap, and any valve or anti-colic insert. Milk hides in the threads of the ring and inside the teat, so every part must be washed separately. Check the teat by holding it up to the light and squeezing it — if the hole looks blocked or the teat feels sticky, it needs a thorough scrub.
Step 3: Rinse away leftover milk
Rinse each part under cold running water first. Cold water removes milk protein without cooking it onto the plastic. Hot water on fresh milk residue can set the protein and make it harder to remove.
Step 4: Scrub every part with hot soapy water
Scrub the inside of the bottle with the bottle brush, paying attention to the bottom corners and the neck. Scrub the teat inside and out with the small teat brush, and push soapy water through the teat hole. Wash the ring, cap, and any inserts. Use a circular motion and take your time — a quick swish is not enough. Rinse every part thoroughly under running water to remove all soap.
Step 5: Inspect before sterilising
Hold each part up to the light. If you can see any milk film, cloudiness, or residue, wash it again. A bottle that is not fully clean is not ready for sterilising. Check teats for cracks, tears, or thinning — damaged teats can harbour bacteria in the cracks and should be replaced.
How to clean a bottle brush
Your bottle brush is itself a germ trap. Rinse it well after every use, let it dry upright, and replace it every month or two. Some brushes can go in the dishwasher. A brush that smells musty or has discoloured bristles should be thrown away immediately. Never use the family dish sponge on baby bottles — sponges carry more bacteria than almost anything else in the kitchen.
| Cleaning step | What to do | Common mistake |
|---|---|---|
| Hands | Wash with soap, dry on clean towel | Handling bottles with unwashed hands |
| Bowl | Use a dedicated clean bowl | Washing in the family sink with greasy dishes |
| Taking apart | Separate bottle, teat, ring, cap, inserts | Leaving the teat screwed into the ring |
| First rinse | Cold water to remove milk protein | Hot water first, which sets milk residue |
| Scrubbing | Bottle brush + teat brush, hot soapy water | A quick swish without brushing |
| Rinsing | Rinse all soap away under running water | Leaving soap residue in the bottle |
| Inspecting | Hold up to light, check for film and damage | Sterilising a bottle that still has milk film |
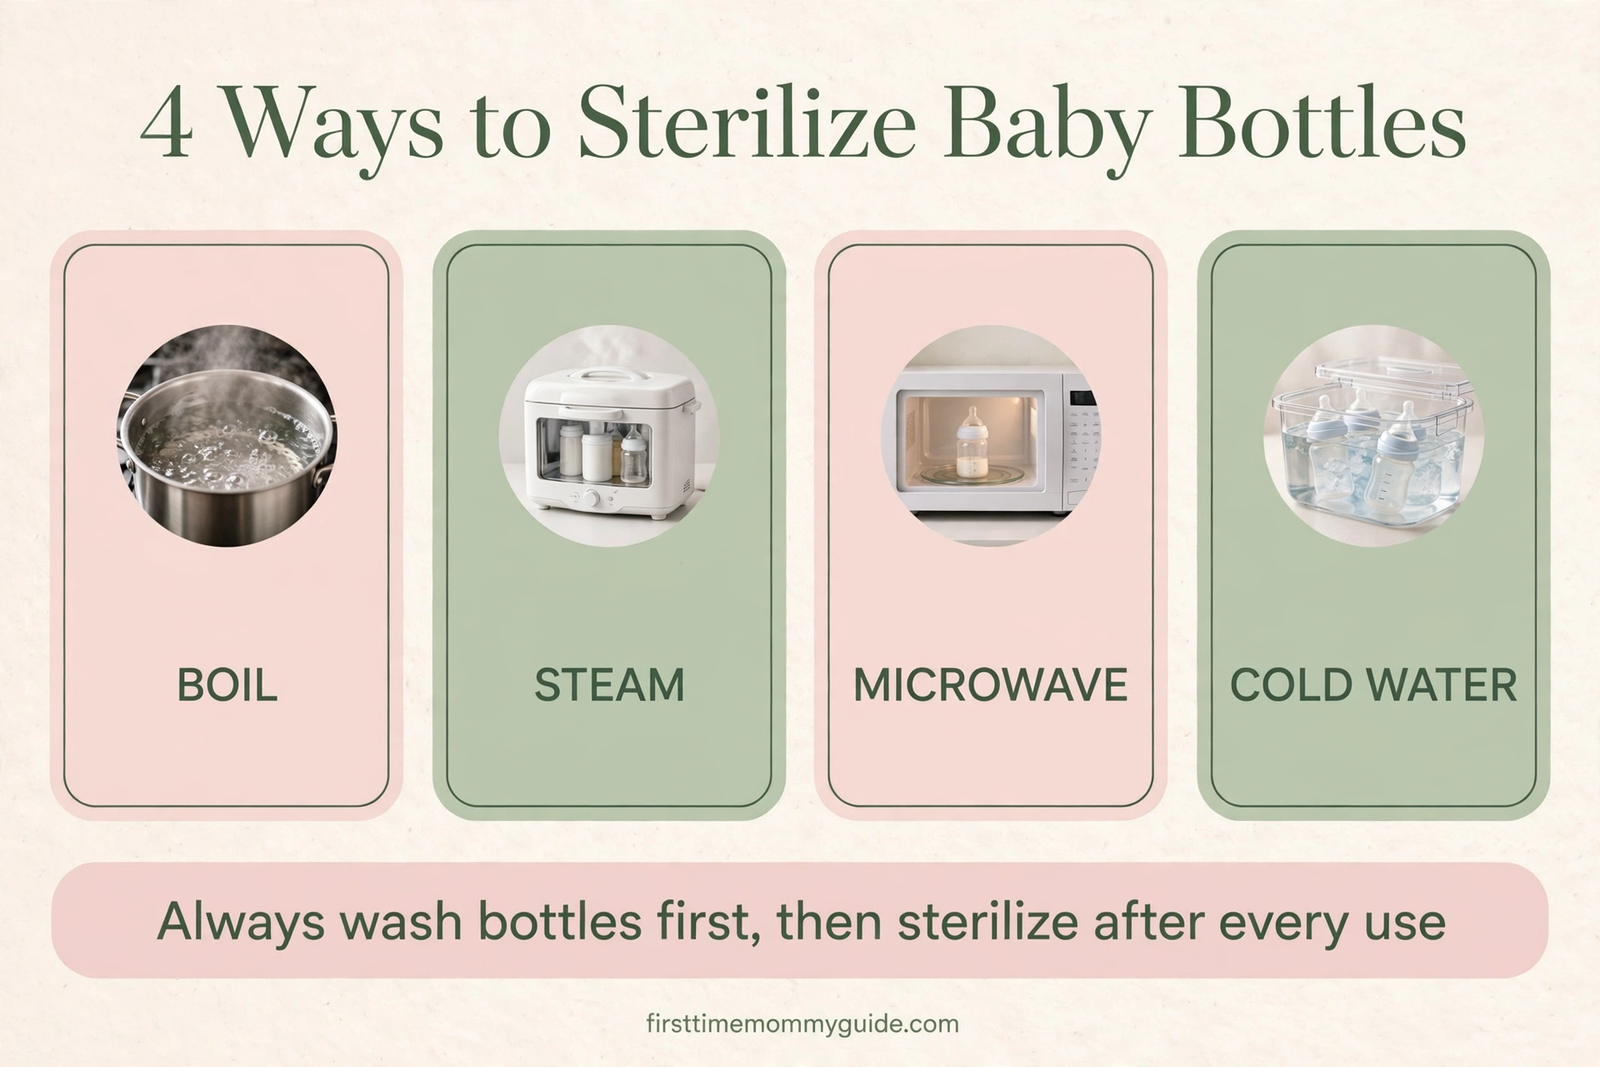
How to Sterilize Baby Bottles: Four Methods Compared
Once bottles are clean, sterilise them using one of four methods. All four are effective when done correctly. The best method is the one you will actually do consistently, every day.
Method 1: Boiling (the simplest, no equipment needed)
Boiling is the oldest method and needs nothing but a large saucepan with a lid.
- Place all the cleaned, separated parts in the pan.
- Cover with water, making sure there are no air bubbles trapped inside the bottles or teats.
- Put the lid on and bring the water to a rolling boil.
- Boil for at least five minutes (some guidance says ten minutes — check your local health authority's advice).
- Leave the pan to cool with the lid on, then remove the parts with clean tongs.
- Use the equipment straight away, or store it as described below.
Pros: Free, no special equipment, works anywhere. Cons: Time-consuming, bottles can be damaged by repeated boiling, and hot water is a scald risk. Check that your bottles are labelled as suitable for boiling — some plastics warp at high temperatures.
Method 2: Electric steam steriliser (the most convenient)
An electric steam steriliser uses boiling water to create steam that kills bacteria in about five to ten minutes.
- Pour the recommended amount of water into the base.
- Load the cleaned parts, bottles upside down, teats and rings arranged so steam reaches every surface.
- Close the lid and switch on.
- Wait for the cycle to finish and the light to signal it is done.
- Leave the lid closed until you need the equipment — most sterilisers keep contents sterile for up to 24 hours if unopened.
Pros: Fast, automatic, keeps bottles sterile for 24 hours if unopened, and many models also dry the bottles. Cons: Costs money, takes counter space, and needs regular descaling in hard-water areas.
Method 3: Microwave steam steriliser (fast and cheap)
A microwave steam steriliser is a container with a lid that uses your microwave to generate steam.
- Add the recommended amount of water to the base.
- Load the cleaned parts and close the lid.
- Microwave for the time stated in the instructions — usually two to eight minutes depending on your microwave's wattage.
- Let it cool for a few minutes before opening, because the steam is very hot.
- Remove parts with clean tongs or clean hands.
Pros: Cheap, fast, no extra appliance. Cons: Uses microwave space, times vary by wattage, and you must follow the instructions exactly. Never microwave bottles with metal parts, and never microwave a bottle of formula to warm it — microwaves heat unevenly and can create hot spots that scald your baby.
Method 4: Cold-water sterilising (best for travel and childcare)
Cold-water sterilising uses a chemical solution — usually chlorine-based tablets or liquid — in a covered container of cold water.
- Fill the sterilising unit with cold water and add the tablet or liquid at the stated concentration.
- Submerge all cleaned parts, making sure there are no air bubbles and everything is fully underwater. Use the grid or plate provided to hold items down.
- Leave for the stated time — usually 30 minutes.
- Leave the items in the solution until needed, or remove with clean hands or tongs. There is no need to rinse, unless the instructions say so.
- Change the solution every 24 hours.
Pros: No heat, no electricity, portable, and safe for all bottle types. Cons: Bottles can develop a slight chlorine taste or smell, items must stay fully submerged, and you need to buy tablets or liquid regularly. Cold-water sterilising is the method many nurseries use, and it is the best option for holidays and travel.
| Method | Time | Cost | Best for | Watch out for |
|---|---|---|---|---|
| Boiling | 10–15 min | Free | Any home, no equipment | Scalding risk, plastic damage |
| Electric steam | 5–10 min | £30–£100 | Daily home use | Descaling, counter space |
| Microwave steam | 2–8 min | £10–£25 | Small kitchens | Wattage varies, hot steam |
| Cold water | 30 min soak | Tablets ongoing | Travel, nurseries | Must stay submerged, taste |
How to Dry and Store Sterilised Bottles
How you dry and store bottles matters as much as how you clean them. A perfectly sterilised bottle can pick up bacteria from a damp tea towel or a dirty shelf.
Air-dry, do not towel-dry. Place bottles upside down on a clean drying rack, or on a clean tea towel on a draining board, and let them air-dry completely. Towels — even clean ones — can transfer bacteria. If you use a tea towel, use a fresh one each time and do not rub the inside of the bottles.
Store assembled or covered. Once dry, assemble the bottles with the teat, ring, and cap in place, or store the parts in a clean, lidded container. This keeps dust and bacteria out. Store them in a clean cupboard, not on an open shelf near the sink where splashes can reach them.
Use within 24 hours. Sterilised equipment kept in a closed steriliser or a clean sealed container stays sterile for up to 24 hours. After that, sterilise again before use. If you take a bottle out of the steriliser and leave it open on the counter, it is no longer sterile.
Handle with clean hands. Always wash and dry your hands before touching sterilised equipment, and handle bottles by the outside, not by the teat or the inside of the neck.
How Often Should You Sterilize Baby Bottles?
Sterilise after every use until your baby is 12 months old. Every bottle, teat, cap, ring, and any part that touches milk should be washed and sterilised after each feed. This is the advice of the NHS, the CDC, and the AAP. It sounds like a lot of work, but with a daily batch routine it becomes automatic: wash bottles after each feed and keep them in a pile, then sterilise the whole batch once or twice a day.
Breast pump parts that touch milk should be washed after every use and sterilised at least once a day for the first three months, or for premature or immunocompromised babies. After three months, daily washing with hot soapy water is usually enough for pump parts, but check your pump manufacturer's guidance and your doctor's advice.
Other feeding equipment also needs sterilising: dummies (pacifiers), teething rings, and any spoons or bowls used for milk feeds. Dummies should be sterilised daily until six months and washed thoroughly after that. Our guide on how to stop baby thumb sucking also covers dummy hygiene, since many parents use dummies alongside bottles.
When can you stop sterilising? After your baby's first birthday, their immune system is stronger and they are putting all sorts of things in their mouth anyway. At that point, thorough washing with hot soapy water is usually enough, and sterilising can stop. Many parents continue for a few extra weeks out of habit, which is harmless. If your baby was premature or has a medical condition, ask your doctor before stopping.
Making Up Formula Safely
Sterilising the bottle is only half the job — the formula itself must be made safely too, because powdered formula is not sterile.
- Boil fresh water and let it cool for no more than 30 minutes, so it is still at least 70°C (158°F). This temperature kills bacteria that may be present in the powder.
- Pour the water into the sterilised bottle first, then add the exact number of scoops of powder stated on the packet. Always use the scoop provided and level it off — too much or too little powder is dangerous.
- Screw on the cap and shake well until the powder dissolves.
- Cool the bottle under cold running water or in a bowl of cold water until it feels lukewarm on the inside of your wrist.
- Test the temperature by putting a few drops on the inside of your wrist. It should feel lukewarm, not hot.
- Feed your baby straight away. Use the bottle within two hours of making it.
- Throw away unfinished formula after the feed. Never save it, reheat it, or use it for the next feed — bacteria from your baby's mouth multiply in the leftover milk.
Ready-to-feed liquid formula is sterile until opened and is a good option for the first weeks, for travel, and for night feeds. Once opened, use it within the time stated on the packaging and store it in the fridge.
Never use a microwave to warm a bottle. Microwaves heat unevenly and can create pockets of milk hot enough to scald your baby's mouth while the outside of the bottle feels cool. Warm a bottle by standing it in a jug of hot water for a few minutes, or use a bottle warmer, and always test the temperature on your wrist first.
Cleaning Bottles When You Are Out and About
Life with a baby does not stop at the front door, and bottles need cleaning on the go too.
Carry pre-sterilised bottles. Take enough sterilised bottles for the outing, assembled and capped, in a clean bag. Take a flask of freshly boiled water and a separate container of cooled boiled water, plus the formula powder in a dispenser, so you can make up a fresh bottle when needed.
Use ready-to-feed formula for outings. Single-serve cartons or bottles of ready-to-feed formula need no preparation and no steriliser — just a clean, sterilised bottle to pour into, or a disposable sterile bottle.
Disposable sterile bottles are available for travel and emergencies. They come pre-sterilised and are thrown away after one use. They are more expensive, but they are a lifesaver on long journeys.
If you must wash a bottle away from home, rinse it with hot water as soon as possible after the feed, wash it with soap and hot water when you can, and sterilise it as soon as you get home. Do not reuse a bottle that has only been rinsed without proper washing and sterilising.
Cleaning bottles at nursery or daycare. Ask your provider how they handle bottles. Good providers wash and sterilise bottles after every use and store them separately. Send clean, sterilised bottles each morning, labelled with your baby's name, and take dirty bottles home each evening to wash. Our guide to preparing your baby for daycare covers what to ask providers about feeding and hygiene.
Breast Pump Parts, Dummies, and Other Equipment
Breast pump parts. Wash all parts that touch milk in hot soapy water after every use, rinse well, and air-dry on a clean towel or rack. Sterilise once a day for the first three months. Tubing that does not touch milk does not need washing unless milk or condensation gets inside it. Check your pump's instructions — some parts are not suitable for boiling or steam.
Dummies (pacifiers). Sterilise dummies daily until six months, then wash them in hot soapy water. Replace a dummy if it is cracked, torn, or sticky. Never clean a dummy by putting it in your own mouth — adult mouths carry bacteria that can pass to your baby, including the bacteria that cause tooth decay. Our guide to how to clean baby's first teeth explains why this matters even before teeth appear.
Teething rings and toys. Wash teething rings in hot soapy water daily and sterilise if the manufacturer allows it. Wash bath toys regularly — they grow mould inside surprisingly quickly. Squeeze them out after every bath and replace them if you see black spots inside.
Water for drinking. Once your baby starts drinking water, usually from six months, offer cooled boiled water until twelve months in areas where the tap water quality is uncertain, and always use a sterilised cup or bottle. Our guide to introducing water to baby covers amounts and timing.
When to Replace Bottles and Teats
Bottles and teats do not last forever. Repeated washing, sterilising, and biting wear them out, and worn equipment is harder to keep clean.
Replace teats every two to three months, or sooner if you notice any of these signs: the teat is cracked, torn, or sticky; the hole has enlarged and milk flows too fast; the teat has changed colour or gone cloudy; your baby is struggling to feed or the teat collapses during feeds. A damaged teat can also be a choking hazard if a piece breaks off.
Replace bottles if they are cracked, scratched inside, cloudy, or the measurement markings have faded. Deep scratches harbour bacteria that washing cannot reach. Glass bottles should be replaced if they are chipped. Plastic bottles that have been through hundreds of sterilising cycles can become cloudy and brittle — replace them when they look worn.
Check the manufacturer's guidance on your specific bottles. Some brands recommend replacing bottles every three to six months. Keep a note of when you bought each bottle, or replace the whole set when your baby moves to the next teat size.
Common Mistakes When Cleaning Baby Bottles
- Sterilising without washing first. Sterilising does not remove milk residue, and residue protects bacteria from heat and chemicals. Wash first, every time.
- Not taking the bottle apart. Milk hides in the screw ring threads and inside the teat. Wash every part separately.
- Washing bottles in the family sink. The sink carries food bacteria. Use a dedicated clean bowl.
- Using the family dish sponge. Sponges are among the most bacteria-laden objects in a home. Use a dedicated bottle brush.
- Towel-drying sterilised bottles. Towels transfer bacteria back onto clean equipment. Air-dry instead.
- Saving unfinished formula. Leftover formula grows bacteria quickly. Discard it after the feed.
- Reusing a bottle without sterilising. A bottle that has been used once is not clean, even if it looks it. Wash and sterilise after every use.
- Microwaving bottles to warm milk. Microwaves create dangerous hot spots. Warm bottles in hot water and test on your wrist.
- Forgetting the bottle brush. A dirty brush contaminates every bottle it touches. Rinse it after use, dry it upright, and replace it regularly.
- Using too much washing-up liquid. Excess soap leaves residue that can upset your baby's stomach. Use a small amount and rinse thoroughly.
- Leaving sterilised bottles open on the counter. Once the steriliser lid is open, the contents are exposed to kitchen bacteria. Keep them covered or assembled.

Frequently Asked Questions About Cleaning and Sterilizing Baby Bottles
How often should I sterilize baby bottles?
Sterilise bottles, teats, and all feeding equipment after every use until your baby is 12 months old. Wash them after each feed and sterilise the whole batch once or twice a day. After 12 months, thorough washing with hot soapy water is usually enough, unless your doctor advises otherwise.
Do I need to sterilize bottles if I wash them with hot soapy water?
Yes, for the first year. Washing removes milk residue and most germs, but it does not kill all bacteria and viruses. Sterilising kills the remaining germs. The two steps work together — washing first, then sterilising — and neither one alone is enough for a baby under 12 months.
What is the best way to sterilize baby bottles?
All four methods — boiling, electric steam, microwave steam, and cold-water sterilising — are effective when done correctly. Electric steam sterilisers are the most convenient for daily home use, boiling is free and needs no equipment, microwave steam sterilisers are fast and cheap, and cold-water sterilising is best for travel and nurseries. Choose the method you will use consistently.
How long do sterilized bottles stay sterile?
Sterilised bottles stay sterile for up to 24 hours if they remain in a closed steriliser or in a clean, sealed container. Once the lid is opened or the bottle is left uncovered on a counter, it is exposed to kitchen bacteria and is no longer sterile. Assemble bottles with the cap on, or store parts in a lidded container, and re-sterilise after 24 hours.
Can I put baby bottles in the dishwasher?
Dishwashers clean bottles well at high temperatures, but they do not replace sterilising for babies under 12 months. If you use a dishwasher, place bottles and parts on the top rack, use a hot cycle, and still sterilise them afterwards. Dishwasher detergent can leave residue, so rinse parts after the cycle. A dedicated bottle brush and hand-washing gives you more control over cleaning the teat and ring.
How do I clean baby bottles without a sterilizer?
Boiling is the simplest steriliser-free method: put the cleaned, separated parts in a large pan, cover with water, and boil for at least five minutes. Cold-water sterilising tablets are another option that needs no equipment beyond a clean container with a lid. Both methods are recommended by health authorities and work just as well as an electric steriliser.
When can I stop sterilizing baby bottles?
You can usually stop sterilising after your baby's first birthday, when their immune system is stronger and they are eating a varied diet and putting everyday objects in their mouth. Switch to thorough washing with hot soapy water. If your baby was premature or has a weakened immune system, ask your doctor before stopping.
How do I clean the inside of a narrow-neck baby bottle?
Use a bottle brush designed for narrow necks, or a long-handled brush with a small head. Fill the bottle with hot soapy water, insert the brush, and scrub in a circular motion, paying attention to the bottom corners. Rinse thoroughly under running water and hold the bottle up to the light to check for any remaining film. Soaking a bottle in hot soapy water for 30 minutes before brushing helps loosen dried milk.
Can I reuse a baby bottle without washing it?
No. A bottle that has been used once contains milk residue and bacteria from your baby's mouth, even if it looks clean. Wash and sterilise it before the next use. Reusing an unwashed bottle is one of the most common causes of stomach upsets in bottle-fed babies.
How do I get rid of the milky smell in baby bottles?
A milky smell usually means milk residue has built up, often in scratches or in the teat. Soak the bottle and parts in hot soapy water for 30 minutes, scrub thoroughly with a bottle brush, and rinse well. If the smell persists, the plastic may be worn — replace the bottle. Sterilising alone will not remove a smell caused by residue.
Is it safe to use cold-water sterilizing tablets?
Yes, when used at the concentration stated on the packaging. Cold-water sterilising is recommended by the NHS and used widely in nurseries. Make sure all parts are fully submerged with no air bubbles, leave them for the full stated time, and change the solution every 24 hours. Some parents notice a slight chlorine smell — this is harmless and fades quickly.
How do I sterilize baby bottles while travelling?
Cold-water sterilising tablets and a collapsible container are the best travel option — they need no electricity and work anywhere. Alternatively, carry enough pre-sterilised bottles for the journey, use ready-to-feed formula, or use disposable sterile bottles. In a hotel, you can boil equipment in a clean kettle or saucepan if one is available.
How often should I replace bottle teats?
Replace teats every two to three months, or sooner if they are cracked, torn, sticky, discoloured, or the milk flow has changed. Check teats before every use by holding them up to the light and pulling gently — a teat that is about to tear will show a weak spot. Always keep a spare teat in the nappy bag.
Can I sterilize breast pump parts in the same sterilizer?
Yes, most breast pump parts that touch milk can be sterilised in the same steam steriliser or by boiling, as long as the manufacturer allows it. Check your pump's instructions first — some parts, such as certain valves or membranes, can be damaged by steam. Wash pump parts after every use and sterilise at least once a day for the first three months.
What is the safest way to make up a bottle of formula?
Boil fresh water and let it cool for no more than 30 minutes so it stays above 70°C. Pour the water into the sterilised bottle, add the exact number of level scoops stated on the packet, shake well, and cool the bottle under cold running water until it feels lukewarm on the inside of your wrist. Feed straight away and throw away any leftover formula after the feed.
Do I need to sterilize the water I give my baby to drink?
For babies under six months, any water used for formula must be freshly boiled and cooled. For drinking water from six months, offer cooled boiled water until 12 months in areas where tap water quality is uncertain. After 12 months, tap water is usually fine. Check your local water authority's guidance if you are unsure.
Why does my sterilized bottle still smell of milk?
The smell means milk residue is still present, usually in the teat, the ring threads, or scratches in the plastic. Sterilising kills bacteria but does not remove residue. Wash the parts again thoroughly with hot soapy water and a brush, rinse well, and then sterilise. If the smell remains after a thorough wash, replace the bottle or teat.
Can I use vinegar or baking soda to clean baby bottles?
Vinegar and baking soda are not recommended for cleaning baby bottles. They do not reliably kill the bacteria that matter, and vinegar can damage some plastics and leave a taste. Hot soapy water followed by proper sterilising is the recommended method. Save vinegar and baking soda for household cleaning, not for your baby's feeding equipment.
Conclusion
Cleaning and sterilising baby bottles is one of those small daily jobs that quietly protects your baby's health. It is not complicated, and it does not need expensive equipment. Wash every part with hot soapy water, sterilise using whichever method suits your home, air-dry on a clean rack, and store bottles assembled or covered until the next feed. Do it after every use until your baby turns one.
Build the habit now, while the routine is new, and it becomes second nature within a week. Keep a clean bottle brush, a dedicated washing-up bowl, and a few spare teats on hand, and sterilise in batches so a clean bottle is always ready. Your baby will never know how much work went into that clean bottle — they will simply stay healthy, feed happily, and grow. That is the whole point.
This article is for general information only and is not a substitute for medical advice. Follow your local health authority's guidance on bottle sterilisation, and ask your paediatrician or health visitor if you have questions about your baby's feeding equipment.

Dilawar Mughal
Founder and editor, First Time Mommy Guide
I research every guide against what the NHS, the AAP and the WHO publish, then write it in plain English — because most new parents are reading with one hand free, not comparing clinical guidelines. I'm not a doctor or a midwife. Every health claim on this site is sourced and linked so you can check it yourself, and anything urgent belongs with your health visitor or GP, not a blog.